Showing posts with label Colourful. Show all posts

Saturday, 17 January 2015

January Blues

I always assume that January will be a quiet month, one where no one will want to go out because no one has any money. I'm always wrong, ha ha. I've been out for dinner, am planning a trip down to London mid-month, three leavings dos, and I couldn't make it to a murder mystery evening due to the number of invitations bandying about! So naturally I have been grumbling about my fabulous social life instead of just getting on with it. Sometimes I pine for the days where my one social outing a week was the craft club in Edinburgh, and then I remember that no social life is no fun at all and I get on with it. How has everyone else's week been? Do you moan about having 'too much' to do?


I've been wearing my comfiest clothes in this super cold weather, trying to stay warm and not moving much from the brand new sofa where I can. This outfit is a comfy weekend/ evening favourite, another 2014 make, I'm catching up promise! The top is based on the Coco pattern. You may remember I attempted a dress from this, and though the comfiest dress ever, I didn't feel pulled together enough for day to day wear. However, I did see potential in the pattern.


I wanted a pattern to match my favourite jumper (the black and white one in this post), so laid the coco pattern over the jumper, with a roll of pattern paper underneath. I then matched up the under arm seam, and neckline. Areas where my RTW jumper extended past the pattern, I drew onto the paper underneath. 

I then took the jumper away and matched up the Coco pattern with the new lines. I followed the Coco pattern instructions to complete, and got the following jumper! 


The material is a mystery knit from a basket at Abakhan, with a lovely stripe of gold for a bit of glam. I've still got loads left, maybe I'll attempt a cardigan too? The skirt is an unblogged New Look 6128, very straightforward, navy cord skirt, nae fuss. this is a workhorse outfit. I've been trying to work at filling gaps in my wardrobe, and this certainly ticks all the boxes on that. 


Friday, 15 August 2014

Holiday..!

Makes you feel so nice

There have been a flurry of holidays here, I spent a week in Donegal with Mr Ts family, relaxing, drinking too much red wine, walking about, kicking butt on the pitch and putt, getting burnt on cloudy days, standard british holiday goodness.

Also it was my birthday on Sunday! So I went camping, for the first time successfully getting a group of my friends on holiday together! (believe me this is a feat in itself). Here I got burnt again, played a viking game called kubb and narrowly avoided hurricane Bertha. Safe to say 26 is a good year so far.


And now we've just booked a holiday in amsterdam for next week! It's all holiday here. On that note, I'm going to be sewing with the above very soon... still don't know exactly what I'm going to do, but now I definitely know it has to be amsterdam worthy!

See you on the other side.

Friday, 25 July 2014

Sister feathers dress

As part of my continuing challenge myself to do things plan I've been making clothes for other people. I want to learn all the neat tricks for fitting, as well as getting myself out of my comfort zone of clothes for me. I have specific tastes in clothes, and though that's awesome for me it means I don't get much opportunity to make things that are a bit different. 

My sister has a whole set of completely different clothes/ comfort zone. Check out her pinterest board to see some of her style. So for her birthday I decided that I wanted to make her something special. 


You may have seen this fabric on Charity Shop Chic recently. I also picked this up at the Minerva meet-up recently, which was a fantastic day. I love seeing how people use and interpret fabrics in completely different ways, do you know of anyone else whose used this glorious fabric? Here I have used the fabric in a single layer for a floaty soft garment. The pattern is from Lekala, a rather unusual russian website where you input the measurements and they send you a bespoke dress pattern to print off. I wouldn't use it all the time, but they had a dress that I liked (sans collar) so gave it a go. The instructions were pretty hilarious, basically 1. attach sleeve 2. sew together ha ha.


I won't lie it was a bit of a bugger to sew. I mean sure it slips and slides around a lot which is the usual for this sort of fabric. But unfortunately the print is almost a sort of coating, so when I used my usual thin needle, it was catching threads and pulling. With it being such a dark colour when it pulled it was really obvious with a big white line. Therefore I swapped for a thin stretch needle. Because of the ballpoint, instead of piercing the fabric it slips to the side of the threads thus limiting the number of pulls.


No pattern matching here I'm afraid. Hopefully it will fit and my sis will treat us to a pic of it in all its glory. So nerve wracking sending something off and hoping for the best. Hope you like it sis! 

Saturday, 21 December 2013

Accessories and Venue


The veil, I wanted to buy my veil by the time I had finished the dress, I was tired to be honest and a bit wiped out with all the other making we'd been doing. Unfortunately we couldn't find a nice one under about £100 so out came the sewing machine! I mean veiling is about £5 a metre for goodness sake.

To make the veil I picked up the 1 1/2 metres I had bought, clipped it to my head with a kirbi grib and marked on where I wanted it to end. I then led it out on the ground, cutting off any excess. I then folded it first in half lengthways and then downwards, and rounded off the edges. I looked up how to make one online but couldn't really grasp their instructions. But once I had the fabric laid out the material all became clear.

I had made the flower for my bouquet but as I had two it was making the bouquet unbalanced, so I used it on the veil! I used a variety of lace including that used in the wedding dress, and then attached a small veil comb underneath. To finish the edges I used 3metres of ivory lace trim, just sewing it flat onto the raw edge as veiling does not fray.


The bouquets were a joint effort between my mum and me, the two at the bottom were made using the excess off the bottom of the bridesmaid dresses so as to match my beautiful bridesmaids! The leaf you can see poking out of the top one is a felt cut-out of a leaf I picked up when Terence and I got engaged. I knew there was a reason I was so sentimental!


Here you can see a sample of the (over 100m!) of bunting that we made for the wedding. My sister and I cut out the majority of the triangles (with some help from Mother in Law), and my Mum sewed basically all of it together herself. Don't know how she managed to keep going, it was amazing! We used all sorts of colours and designs, trying to stick mostly with the blue and green but adding in the odd galaxy fabric to keep things interesting!

One of my favourite elements of the decoration were the centrepieces, they were made with hand-made flowers, spray painted candelabras, dinosaurs and animal toys and a whole mess of help from all of our amazing friends and family. Thank you to you all, I'll leave you with the pics as they tell the story of their construction better than I ever could.


You made it through the wedding posts! Well done! Just wanted to add a quick note to say thank you to everyone who helped us with this. It was the biggest thing we've ever done/ will probably ever do again. Thank you to all those who had a hand in our wedding, whether you made things, or just listened to us gripe for months on end about all sorts of nonsense. We love you guys! You made our day what it was.

Sunday, 28 July 2013

Sort of skorts refashion

Hello everyone!

So sorry for the delay in postings... I'm pretty sure you'll have heard this excuse floating around but we had a summer! I mean... a real honest to goodness summer with warm weather every day :-0 What with keeping up with watering the plants (which have gone mad in this weather... im sure they're twice the size than any other plants I've grown before) and keeping up with all the relaxing in the backyard/ bbqs/ games of scatterball, both sewing, and blogging about sewing have taken a back seat.

Also... we went to Barcelona! Now I know this may seem strange seeing as me and Mr T have been together for about 9 1/2 years, but we'd never been on a proper holiday abroad together for longer than a weekend. So this year, after our now both having jobs which involve using our brains (the cheek of it!), and pushing to get the wedding invites out (now sent! Arg... it's really happening) we have exhausted ourselves and therefore we really needed a break. We had a great week in the sunshine and now feel super relaxed. So that's you up to date!

Now for sewing, I needed some quick makes for summery weather, with all the nice weather we've been having I had a good idea of what I needed, shorts! I find it really hard to find flattering trousers/shorts. Problems being, they're either far too tight, making me feel very aware of my shape/body, or way too lose, not fitting to my waist/hips. Now I know there's nothing wrong with my shape/ body, I just know that it's quite curvy, and I just don't want to feel bootilicious when I'm walking about... I wan't to be comfy.

I bought the below jumpsuit a few years ago...

and it definitely fits in the super big category:
It's super comfy, I've had it quite a while, and I have worn it quite a bit. But it had fallen out of rotation, the little lapels made it feel kind of formal... but because it's big it felt kind of casual, so the time to wear it never came up. Her below is not impressed:

 So! it was time for a refashion. Not something I do very often to be honest, though it's something I should do more, as I've recently been buying quite a bit of clothing. I think it was the move to Manchester, the shops are so much more diverse here in comparison to Edinburgh. I'm bound to find something I like. It's rather dangerous for the wallet, especially as we've just got back from holiday... plus the wedding.

So anyway getting back to the sewing, my I'm chatty today. I started by wearing the jumpsuit in front of the mirror, the crotch was so low on these they were practically hammer pants so I pulled them up a little, and marked my natural waist line, cutting across the middle (ensuring the buttonhole and button where about 1" below the cutting line). I then tried them on with a belt to make sure he height was right:
Ooh look at me getting all posy in the garden he he. So they fit right yay! I then measured my waist, and the top of the shorts. I used this to create two open pleats in the front, and smooth ones in the back.

I didn't really have any material that was going to blend well with the material of these shorts so I decided on a contrast fabric, tying in with the spots on the pockets. And I used one of my orange apple buttons. I bought these for my georgette mathilde, but the orange was just too bright, perfect for these summery shorts.

They were so useful on the holiday, and I know I'll get loads of wear out of these super sort-of skorts. Plus I still have the top part, and I'm thinking of adding a contrast dress to the bottom, two refashions for the price of one!

I've still got a couple of pre-holiday makes to show you, but I've got secret wedding things to do so I might be a little quieter in the next couple of weeks.

In the meantime, here's some pics of me jazzing it up in the back yard, by the bin :-) Happy summer!

Monday, 10 June 2013

Dino Blind

So I've been trying to tweak the bathroom, make it as colourful as possible to detract from the strange grey geometric tiling. I think i'd quite like the tiles if they weren't on every wall. I'm not a big fan of this in general, I think it has something to do with going to university housing where all the walls and floors were covered in beige tiles.

So anyway... dino blind! Not much to this one, me and Mr T each chose a dinosaur, (me being stegosaurus, his being a velociraptor, and we spent a happy evening watching tv and cutting out dinos from sticky back vinyl plastic pieces (from amazon, you can choose whichever colours you want!)

I adjusted the blind (got to play with a hacksaw), measured the blind and marked where the dinos would go, and that was it! Love this blind, kind of want to put ones in every room of the house now.


Sunday, 19 May 2013

Storm Trooper Desert


This is our Storm Trooper blue desert, not much to explain really. We bought the cactii from a giant garden centre that has opened near my mum and dad, and I got the mini greenhouse years ago at the Gardeners World show in Birmingham. I love gardens, and gardening, and my sewing usually takes a back burner this time of year while I try and keep up with all the seeds and things that are ready at the moment.

I lined the base with a thick compost bag, filled it with compost and then placed the cactii (still in their pots) in between the compost, the cactus on the right was deadly! All I did was brush it and my whole hand was covered in tiny needles, I'm glad it's safely behind glass now. I then covered in the blue sand, and placed the all important storm trooper pride of place in his desert, he finds it very difficult to stand up.

This is now my favourite corner in the house, with the jellyfish from my previous post, curtains all hung up, and now a new lamp and lampshade which goes with the colour scheme in the room (instead of the red which Mr T was pretty attached to. More house things to come, including an in-depth look at my sewing room, the first room in the house that feels properly finished!

Sunday, 24 February 2013

Introduction to Embroidery, and teaching stuff

So over the past few months I have been hinting at a very exciting something coming up in the future. This is something I've wanted to do for the longest time, and I thought I'd share my feelings on why! But first, details of the course.

Dun dun du-dun dun duuuuh!

I will be teaching a hand embroidery class at Fred Aldous in Manchester for the wonderful people at Ministry of Craft.

In a three hour slot you will learn how to make this Russian Doll design on a classy tea towel, and take away two patterns for smaller Russian dolls to complete the set.

You will learn basic embroidery stitches, including backstitch and chain stitch, then progress up to daisy chain, blanket stitch and french knots.

The class costs £35 and you can reserve your place here.


So onto the philosophising! I'll begin at the beginning, when I was at School I decided to be a teacher, probably a secondary school teacher (because teaching teenagers for some reason didn't scare the bejesus out of me) and teach them English, possibly Drama. So I went to uni to do Literary Studies, Classic Civilisations and Drama. This was when the train became derailed slightly. I was put off teaching, I had exhausted my brain. I didn't want to go straight into teacher training, I wanted to do nothing, sit around all day and stare at the TV and not think about the future. This is something I've heard from alot of other people at university, that actually instead of motivating you to go forward you feel demotivated, lacking in energy and generally depressed by the end of it. Is this something you've encountered/ experienced? I'd love to hear your thoughts.

So I decided to take a couple of years off, whats the rush? I said, teaching will always be there, and what with the further study and the hell a lot of work involved when you get the job I just couldn't face it. So I worked, first in a fabric shop, where I learnt loads of new crafting skills, and then got into admin jobs (another thing loads of people from uni are now doing). I attempted to sew and sell stuff for a while, but realised that I don't like doing lots of the same item over and over, I don't have the patience for it. Also, selling to people who have that look in their eye (I could make that) became depressing. Therefore all power to those who manage this! I bow down to your patience and perseverance. If you do this, share your thoughts on how you manage it, I'd love to hear them.

And then I moved to Edinburgh, where I decided now was the time to apply for teacher training, so I became a Scout leader to gain experience. I also joined Granny Greens and started helping out on the workshop evenings, throwing in tidbits of help here and there, which then grew to become leading most of the workshops at the craft group by the time I'd left (bigging myself up here). Now I loved the teaching aspects of these (due to the aforementioned wanting to teach) but they took up a lot of my free time, especially Scouts. And it occurred to me that I enjoyed doing this more than I would teaching. I was doing the things I wanted to do, leading young people (Scouts) and teaching crafts!

So! In conclusion, my dream now is coming true, and I'm going to be teaching a classroom full of people the basic skills needing to embroider. I'm so excited, and can't wait to get started. I can do my day job, which gives me the perfect balance of money, challenge, and going home not thinking about work, and I can do extra projects which fulfil my need to teach. I hope I see some of you at the class.

A very excited Deborah

Monday, 29 October 2012

Autumn/Winter Inspiration

It's all happening up in Edinburgh, and in my favourite season too. The big move is well on its way and I'm unemployed once more. Mixed emotions, but I'm looking forward to the future. 

So! I've got a little time on my hands (in between the packing etc). And thought I could do with some improvement on my photo manipulation skills. So here are a few of the pictures I've been taking around Edinburgh. Above is Autumn, and below are some festive colours! I used this collage instruction guide from A Beautiful  Mess. It was really easy to use, and didn't make me swear loudly like most computer based things. 

I've some more projects on the way soon, in the meantime, hope you like the pics. You can see bottom right all the green tomatoes I harvested this year, not sunny enough for red tomatoes this year unfortunately but I'm sure they'll come in handy for a certain festive event in the near future. 

Tuesday, 16 October 2012

Swap shopping and packing post


The date of the big move is inching ever closer, and so I'm afraid my blog posts will start to slow down a little while I try and get packed and sorted out.

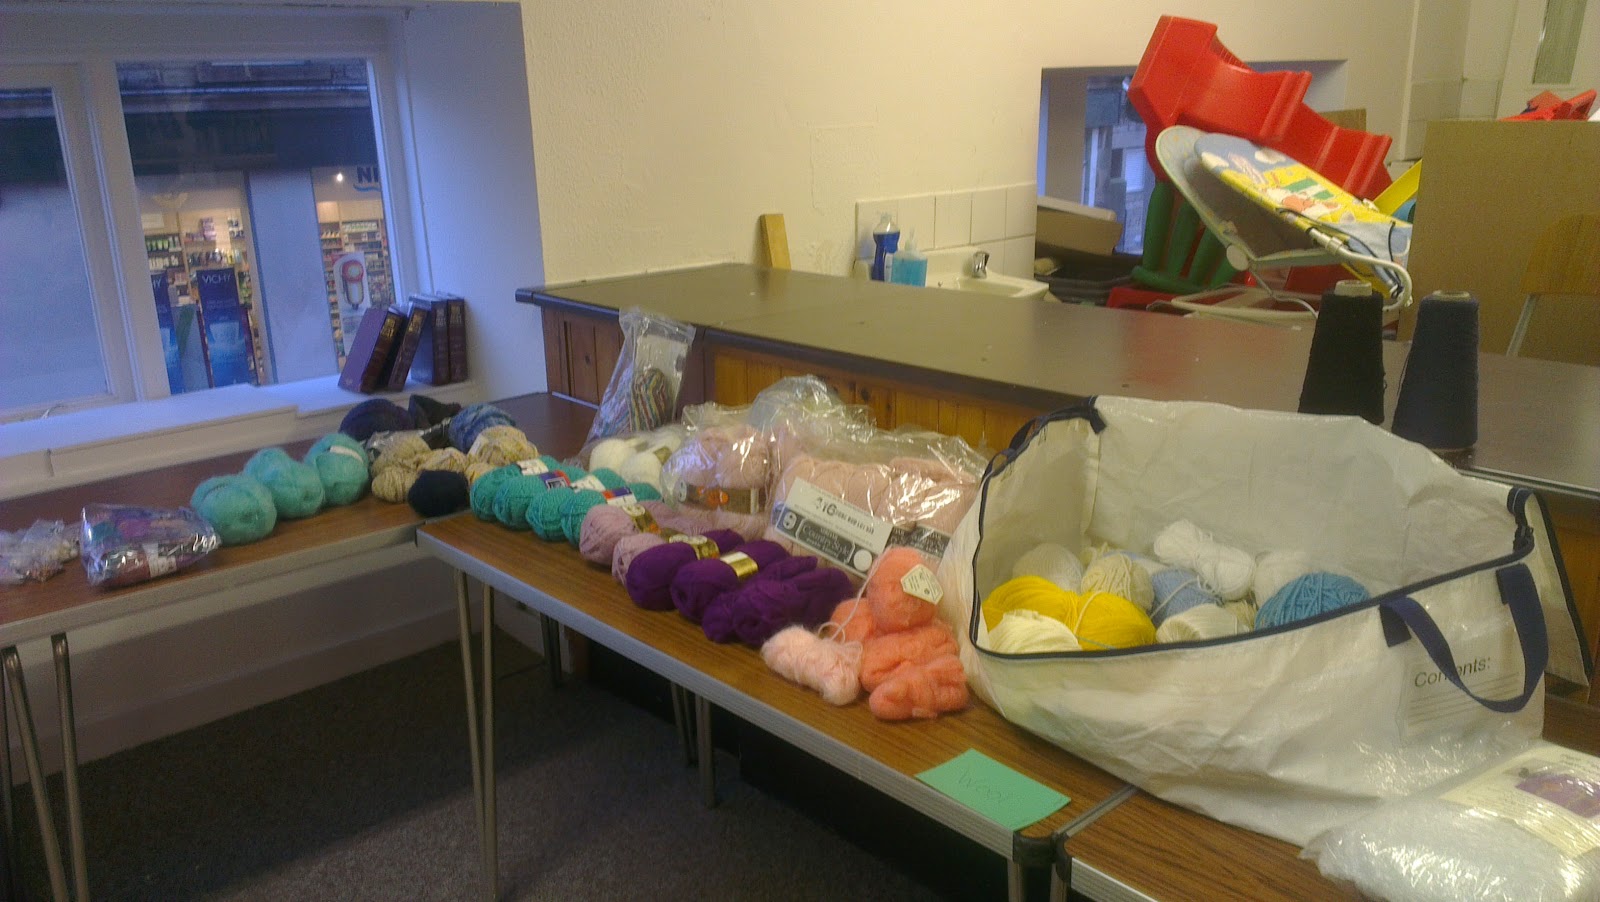
This is also due to having to pack away my sewing machine, and paraphernalia including a massive amount of fabric and wool that I don't actually want or need. So the Granny's Swap Shop came along just in time. I went through all of my craft materials and packed a (shamefully) massive suitcase of stuff which I took along to work with me (donating some wool to work mates along the way), and then took over the Central Hall for some swapping fun!

You can see here the suitcase once it was empty, and the single ball of wool I took home with me, very proud of myself for not swapping my masses of stuff for more masses of stuff.


Everyone was super generous with all of their donations, with everyones gems from the back of the cupboard coming out of the woodwork, including vintage patterns, half finished socks, loads of wool and even some knitting needles!


I had a brilliant night and I feel like I've made my first step on the road to packing. I hope you can see from the pictures below, that I think the rest of the Granny Greens Gang had a great night too, thanks Andrea for organising this brilliant event!


Have you ever done a swap shop? Any hints and tips for finding a brilliant bargain? Or would you like to do one but just don't know where to start? Leave a message below and I'll get back to you.

Thanks, Deborah

Thursday, 4 October 2012

Finishing my crocheted Granny (Greens) Blanket

I have been making a crocheted granny blanket for about two years now, making up a square every now and again when I don't have a project to take to Granny Greens (a local craft group I'm involved in). I've never especially counted them and worked out how many I need etc, (or if I have I don't remember any of the numbers). 


So now that I'm moving down South (and away from the lovely Greeners), I have started to crochet my blanket together. I'm not sure I'll have enough squares, but I need to feel like I'm progressing on this project or I'm likely never to pick it up again.

I chose navy to crochet the squares together, as I find black or white too harsh, and the blanket has so many bright colours that I thought the navy might offset this.

I asked GG's very talented Jen to show me how, and I have decribed below as well as I can the process. Feel free to add any hints or tips below if you're a crochet blanket supremo.

 
I'm assuming here that you have already made some granny squares and understand the basics of crochet. However, if you would like a tutorial on a granny square (I'm assuming Ill have to make hundreds more for this blanket), then please let me know by posting a comment below.


Finding the corner stitch: this is fairly simple, you need to find the right-hand (if you're right handed) corner hole of your square, and identify the stitch which is directly above this hole.

As you can see in these pictures, I have made this hole stick out a bit so you can see it more easily.
Start by creating a slip knot, then hold your two crochet squares together lining up the edges of each square (apparently there is a wrong and right side of a crochet square, but I don't know how to work this out and so have left this out).
You then put your crochet hook through the corner stitches of both squares (one after the other), and loop your wool over the end of these stitches (pic 2).
Now pull your crochet hook through both stitches, catching your new (navy) loop through as you go (pic 3).
Once you pull this through you should have two navy stitches on your crochet hook (pic 4).
Now loop the navy wool over your hook above these two stitches (pic 5) and pull through the two stitches on your hook as you did in pic 3.
You should now have one navy stitch on your hook (pic 6).

In this picture (to the left) I hope you can see where the next stitch is for you to go into. This can be tricky, especially when you use cheap wool like me. But don't worry! If you get the wrong stitch, or miss the odd one no one will ever know.

Good luck with crocheting your squares together, I'd love to see the finished effect.

Because I've been doing this on and off for so long, the size of my squares (and the quality) has varied wildly, and so I've had to be a bit off the cuff when choosing which stitch to stitch into (sometimes missing the odd one to make larger squares match smaller squares).

This probably will have an adverse effect on the neatness of the blanket, but if you like neatness chances are your crochet squares will all be the same size, and you won't have this problem.

The idea for my blanket however is to show my process of development, from the worst square to the best so I don't mind it being a little messy.

Do you have a treasured granny blanket at home? Or a project that shows your development as a stitcher? I'd love to see them!

P.S. Let me know if you'd like that granny square tutorial.

Deborah

LinkWithin

Related Posts Plugin for WordPress, Blogger...