Showing posts with label Blue. Show all posts

Wednesday, 24 June 2015

A & A Cami 3: Shirt Pattern

Good day to you all good fellows. I am back once again from another trip away! What was that people say about resting during pregnancy? Ha ha. No, to be fair these trips have been very restful if not a little sore on the hips. I've worked from home again today so I can recover. 

So I'm back with the last of the adjustment and alteration posts for the Cami pattern. Last week you saw my Cami-Washi hybrid, and I will do a post to show you all of the different iterations of this pattern so far at some point. I hope it goes to show what can be done with one pattern and a few changes. 


Chronologically, after my last Cami shirt I made the Christmas dress that you can take a nosey at here. The one change that I made to the shirt at this stage was to widen the lower half of the armhole. You may remember that in the last installment of A&A I had extended the armhole, so this now fitted well. However, the width across the arm was still tight, especially in the non-stretch of the navy cotton I had used. Therefore I made the following adjustment to the sleeve pattern, 

I began by drawing a straight line down the centre of the sleeve pattern:
I then cut through the sleeve pattern piece, leaving a very small amount of the pattern at the top of the sleeve. This was then used as a pivot point, splitting the sleeve by the amount that I wanted. I ensured that the gap was equal on both sides by measuring the amount from the tip to the base of the split. 

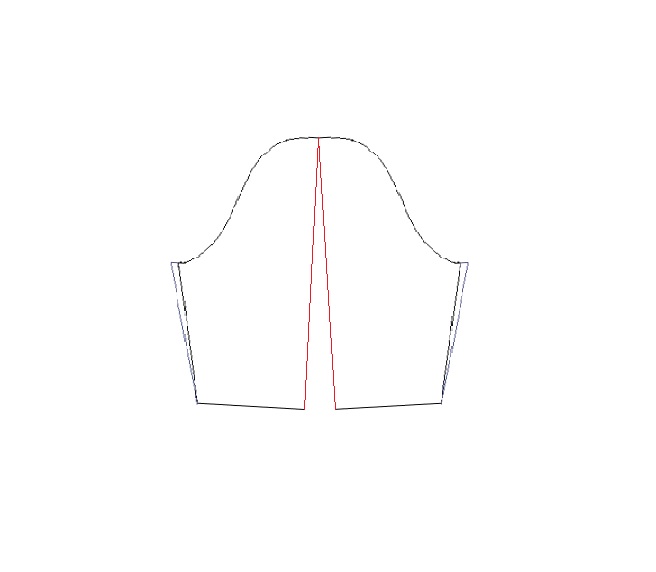
I then re-drew the armsleeve, including in these changes, and removing the angle which was caused at the bottom of the sleeve by the pivoting.

This was a speedy fix and probably caused a bit too much at the bottom of the sleeve, especially on the 3/4 sleeve. This may need a little work if I make another longer sleeved version, but it is perfect for the shorter sleeve. 


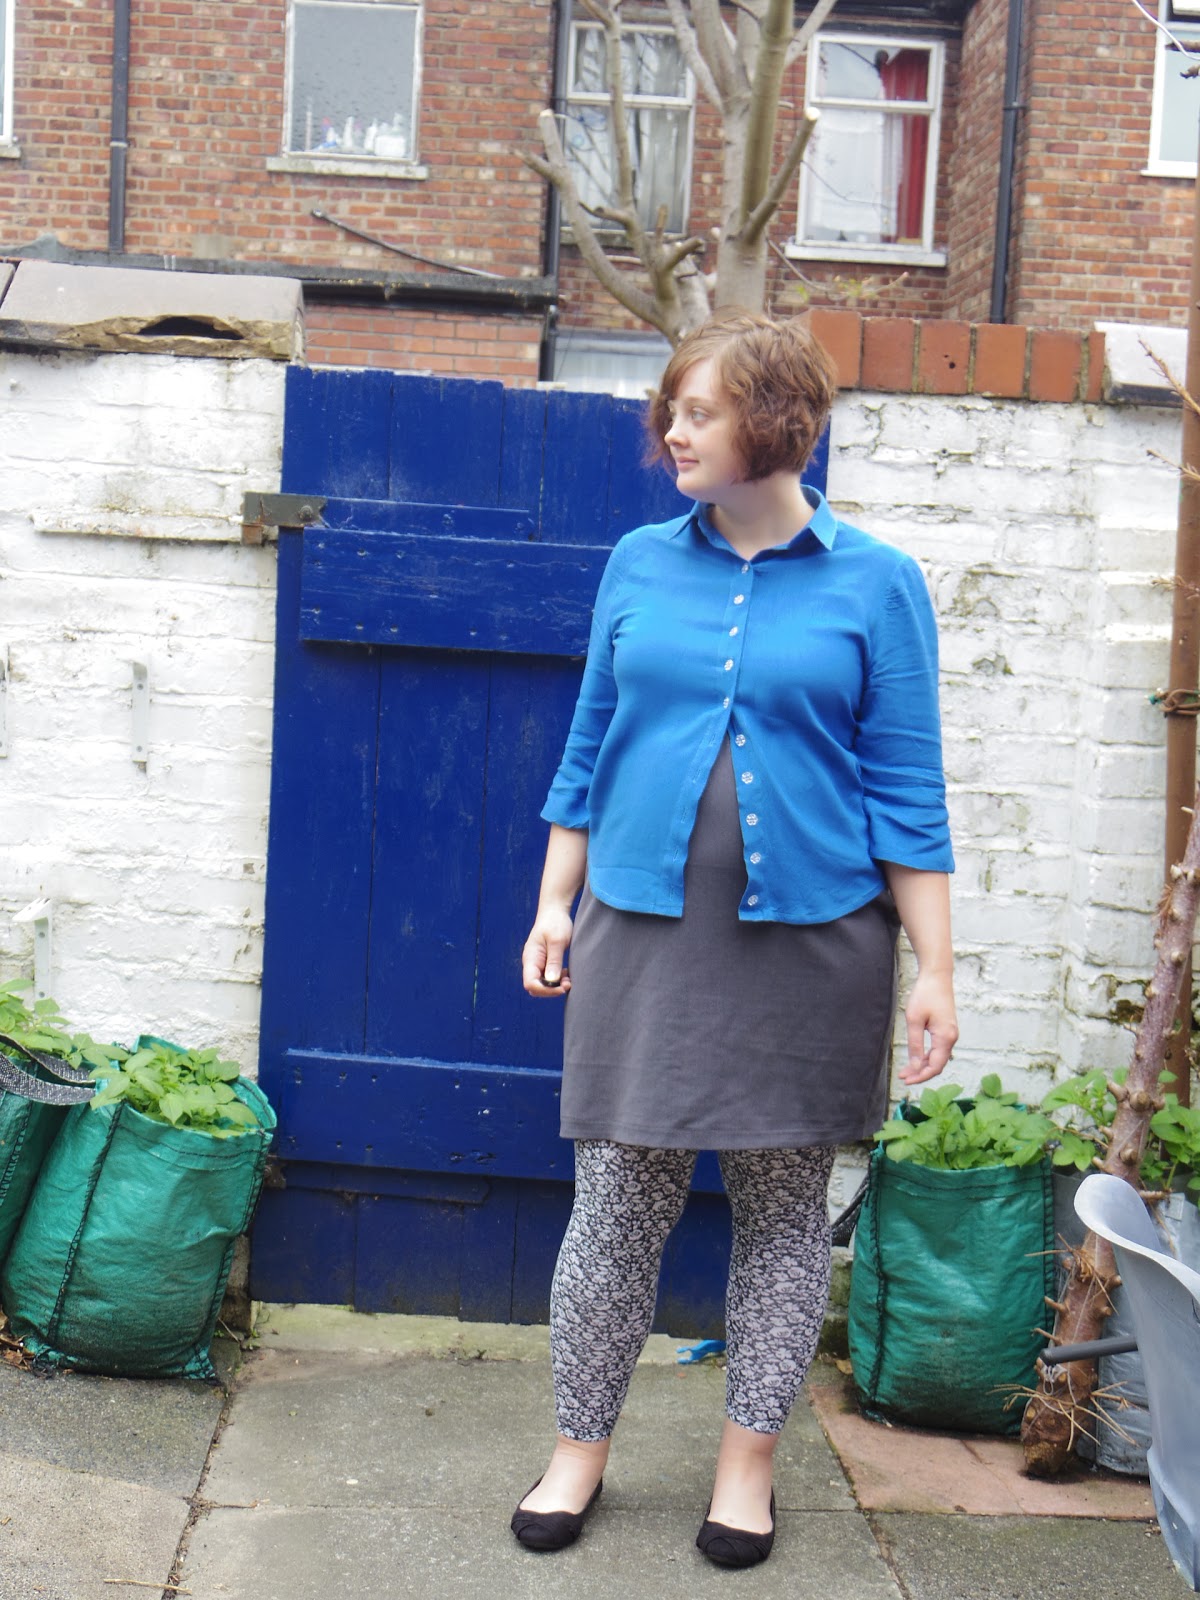
I'm wearing the shirt here with the maternity version of New Look 6128, unfortunately it no longer fits. I think I could make another one with a bit of extra pleating, but I've only got four weeks of work left now so I'm not sure if it would be worth it. I'm very happy with the fit of the shirt, though obviously I can no longer close it ha ha. It works tucked in though, and I have some floaty skirts I can wear with it. I made this in a plain fabric for once which I'm proud of. I didn't even add a quick spot of embroidery to it. Very unlike me!


Cat bombed! You can see that the bottom of the shirt has been shaped more like a shirt than the previous version. I laid a shirt that I had in the drawer over the adapted pattern piece, and traced a new version with a little more room in the hip, and the curve at the bottom of the shirt. 

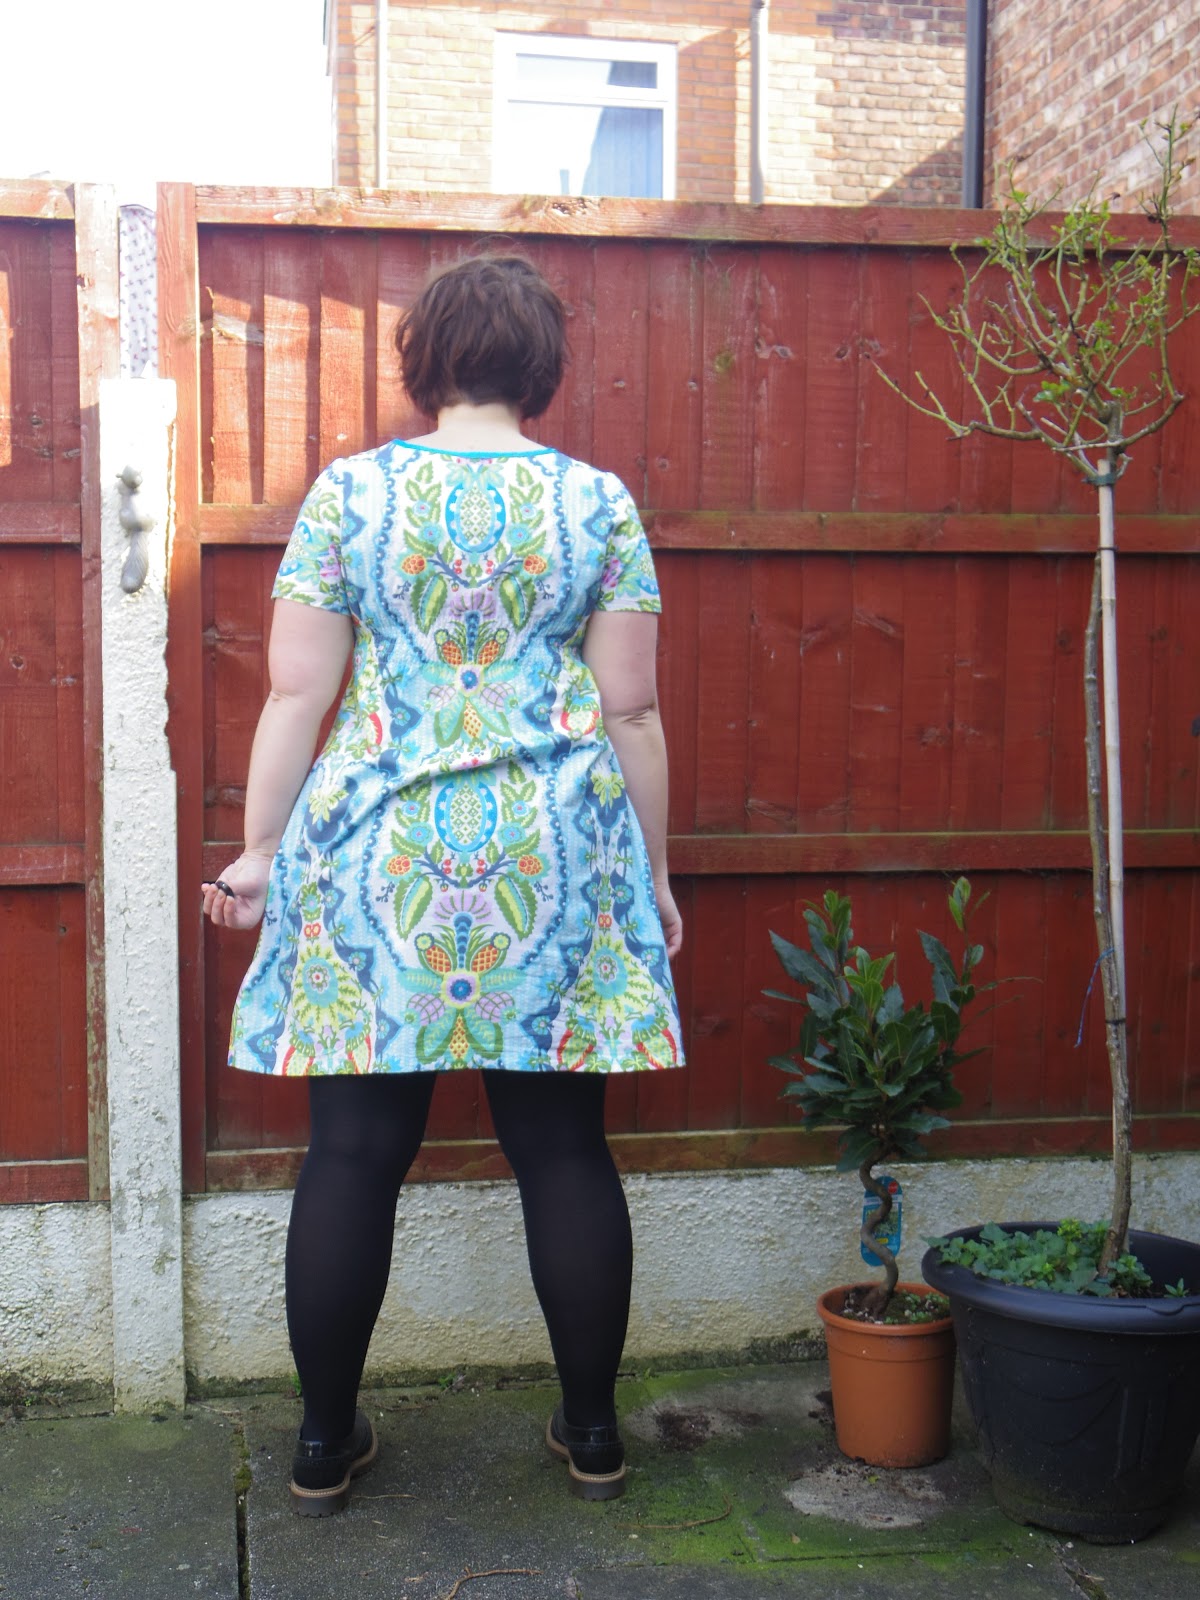
The back of the shirt fits well, though as you can see there are quite a lot of wrinkles in the bottom half of the shirt. I assume this is a sway back issue which needs to be adjusted some more, though maybe it's caused by bump so maybe best to wait before making any changes. 


Here's a little picture of bump, though the usual disclaimer applies, I'm bigger now blah blah ha ha. 


Tuesday, 21 April 2015

Spring Washi - The sunshine is here the sunshine is here!

How are we all this fine day? I was working from home yesterday as unfortunately I'm now suffering from a thing called PGP (I think it's this... I'm still waiting on a doctors appointment) which if you're interested is something that happens to pregnant ladies. If you would like more info, click on the link. Basically it means that the more I walk the more pain I am in, so I've had to not move from a chair for the past couple of days.

As I'm sure you can imagine, this is horrendous when you're like me and love to sew, and see people and pretty much do anything other than sit on your bum (not that I don't love a bit of loafing but everything in moderation right?) So inevitably my brain is on overdrive over the things I could be doing.

Luckily I have a wonderful husband! The ivy from the great Spring Clearing of 2013 had started to grow back, you can read all about the first time I pulled it all down here.

It lasted a single year before the ivy started to grow back, and by this point it had grown completely all over the walls and fences again (though thankfully not quite to the extent that it did the last time). What I didn't realise the first time is that I am crazy allergic to this type of ivy. If it touches my skin I come out in a rash, and the rash spread all over my arms and up my legs. It was a really intense rash to be honest, pretty gross.

So! This time round my wonderful husband did it for me :-D I bought him a pair of shears to help speed the process along, but turns out all he needed was one judo chop!


Judooooo Chop! I am mightily impressed, we've managed to get most of the ivy in the green bin, and I think most of the plants survived the light trampling. Can't wait to get out there again, and start to see the flowers blooming. 

So! In honour of all things spring like, I have sewing to show you: The Spring Washi


I made this in January, when I really needed to feel like Spring was coming, and I wouldn't be cold forever. When I first cut the bodice I stupidly assumed that the fold in the middle of the fabric would be... in the middle of the fabric ha ha. So the very specific design was slightly off centre. I only had so much of this lovely fabric but I managed to piece back together the centre bodice from off cuts. hence the lovely satin piping at the under-bust. It is there to distract from the fact that the bodice and the skirt don't actually pattern match (sshhhh)


I got this beautiful fabric from Matt and Neela, when they came to stay with me last year, along with the rest of the gang. Wow! Was that last year? We need to do that again guys! so props to them for their awesome choice in fabric. 


I didn't have any pictures of the back without that big fold in the fabric. I promise it's not always there, just my booty getting in the way ha ha. 


The sleeves are drafted from the Cami sleeves that I made in the great shirt make-over. But I will save that adaptation for my next instalment of 'adaptation and alteration'.

On Saturday I did a demonstration at Abakhan (from my chair). It was really fun to meet and greet people, have a good natter about the show and what they were sewing. My favourite thing is helping people with new techniques, and I showed them all sorts throughout the day such as hong kong seams and invisible zips. Everyone loves an invisible zip! If I had just demonstrated those all day then I think everyone would have been happy. Have a good week guys, I've got my fingers crossed for slightly more walking about.


This week:

You can find my shiny new column in Sew magazine, learn all about my wedding dress and what I've been up to since the Sewing Bee

Thursday, 11 December 2014

The Fantastically Generous Bloggers Shirt

I had a week off from le blog last week, sacrilege I know! But as you may know from my previous post, I started a new job and as we are on the countdown to Christmas there is just so much to do! I've been bringing a few things together, including some ideas for my secret santas. I decided to take part in two this year. One by A Krafty Kat, the one that I took part in last year, and have grand plans for my pressie. Also I have taken part in a newer crafty secret santa by Stitched Up from the Start I've got a great person and can't wait to get it all wrapped up and sent away.

How has your week been? Mine has been good, the new job wiped me out for the first week, lots of meeting new people (even though I've only moved down the hallway) and wrapping my head round a whole world of new acronyms. But I'm feeling good about the move, and can't wait to go to my (two!) Christmas parties.

When I got this new job, I started to think about getting some more work appropriate clothing. I would say that work clothes are one of the things that I love most about making my own clothes, I think I might have mentioned that in my Washi post. I want something that shows my personality, can be dressed up or down, and is layerable (because I sit on an air vent... not as exciting as it sounds). The photos in this are terrible, you can probably tell that yourself but I thought I'd mention it, sometimes it's either terrible pics or freezing pics while your neighbours watch you whilst clearing a garden. I went with bad pics.


Enter my Pauline Alice Cami Shirt

I got the buttons, and lovely... especially bad photographed bias binding from my secret santa last year, I snuck in under the line for making this before the next Christmas! This lovely packet came with instructions, I was to make a shirt. I hope I did you proud Santa!


Unfortunately I didn't find a place for the light blue ribbon, but it awaits in the stash for the perfect project. 

The detailing comes from another lovely bloggers de-stashing from the 2013 Birmingham blogger meet-up, unfortunately I didn't make this years... I was hungover (to my eternal shame). But hopefully it will be on again next year and I can tag along because it was a brilliant day. I got the following material from Amy of Almond Rock, in the great de-stash/ swap, and added it to cuffs and collar.


The shirt is a little tight in the back (see slightly unflattering picture below), I did widen the sleeves as per the adjustments I thought of from the Zig Zag Cami, including a wide shoulder adjustment, which did work as the shoulder seam now sits comfortably on the edge of my shoulder. However, I don't think I widened the arms enough and that is what is causing the tightness. On to the next version!


I bought the skirt in this post from a charity shop in Edinburgh when we lived up there, it had weird little tacked on badges of squirrels and owls, which I removed. It's a great skirt for walking up a hill, or going to the office, and is super warm for chilly knees. The lining was recently falling apart so I attached a new lining to the inside of the skirt, using the edge of the old lining to stitch to.


I love a colourful lining, this was another purchase from the blogger meet-up... there have been a few things languishing in the cupboard for a while ey? Feels good to be using up the stash.

Overall I'm very happy with this shirt, this pattern is on its way to perfect, and once it's right I have so many plans for pattern hacking. I'm very excited!... but should get back to making Christmas pressies. Selfish sewer? Who... me? Hope you have a great weekend.

Debs


Saturday, 18 October 2014

The Epic Coat Challenge


Hello all, unfortunately the photos in this blog post are a little rubbish, due to the temporary loss of my camera charger over a couple of days. I couldn't find anything to take a picture with in the house (in this day and age!) so used an ipad. I am baffled more than ever now by those tourists carrying them round to take pics with.... cameras are smaller, less cumbersome and the pictures are better. Come on guys, join me in the nineties! I've previously really enjoyed looking at people's RTW (ready to wear) clothes from the inside, and as I was planning on taking this much loved coat apart anyway....


Ta dah! The insides of my coat. As you can see the front two panels are interfaced, and there are shoulder pads made of two layers of felt (one smaller than the other), the raw edges aren't finished on the inside, but all of this was enclosed in the lining. On the arm scye, there is some paper interfacing as a seam binding.

This was not the only nod to tailoring in this coat:


Catch- stitching on the inside, this looks like it's somehow done by machine, perhaps in the same way as an invisible hem?


Once I took these pics, I proceeded to take apart one full side of the coat, taking it back to its individual pieces. I traced these off on to tracing paper to create a full pattern for the coat, adding in 'fold here', 'cut two' etc. where applicable. Now I have a coat pattern I know will fit, no muslin necessary! I have made a good start on my brand new coat, as those who follow my instagram will know. I mean, its not a winter coat so when it's done it will go in the cupboard ready for spring, but in season sewing is so last season! 

I also have big plans for what's left of the original coat. I have already dyed the pieces, getting rid of most of the wear, though the lighter places stayed lighter... they're just a darker less grubby colour which is way better. Watch this space and have a great weekend. 

Also,  reached my 100th comment this week! Thanks to everyone who has shared a thought on my page, it means so much and I get very excited any time someone posts a comment, so please feel free always to get something off your chest, ask a question, or even posit a theory on the extinction of the dinosaurs. It is always welcome.

Friday, 10 October 2014

Surly Raccoon Anna Dress

Well, I have come to the end of the summer dress posts! (I think) The weather has definitely taken a turn, the orange leaves are falling, and I needed a coat on my way to work the other day! I bought ths fabric on a trip down to london months ago. Mr T was with me at the time and he said that the raccoons on it looked surly, I think I agree, they don't look that happy to have been squished on to my dress and surrounded by lollipops they aren't allowed to eat.


It was a bit bright for these pics, but I'm no photoshop wizard so unfortunately you will just have to assume there is dress in those big white patches ha ha. Can you see the waist? Look at that pattern matching, pretty happy with that! Look at my hair! No wait, don't look at my hair. Why do I look like I don't know what a brush is?!


The back... I put a lot of effort into the matching at the bodice part of the top, and then got bored I guess 'cause I didn't do the bottom. This is why you should take a break when you start to get bored. 


It has pockets yay! I spent the whole of last Sunday going through the wardrobe and putting away my summer clothes. There were definitely things that havent been worn this year. Mostly the summer floral dress type things. I suppose when you have clothes that have angry raccoons on them it's hard to choose to wear vintage roses. I do struggle to get rid of things, I've just put it all in a suitcase under the bed. I took out all my winter gear as well, I love all my woolly jumpers, and wool skirts, mostly things that are wool. Though I have some definite gaps, yay more sewing!


More cat pictures! You're not bored of cat pics yet are you?

NOTE: I have had quite a few requests regarding what patterns I used for this dress, It was made using the bodice from the Anna, and the skirt from New Look 6723. To see how I merged these patterns together, you can read all about it on this blog post. I hope this helps! Deborah

Friday, 19 September 2014

Spotty Anna

The last time I made an Anna dress, I had to make a lot of adjustments to the fit to get it right. This time round I learnt my lesson, I used the finished garment measurements instead. To do this I used my Upper bust, bust and waist measurements.

There is usually only about 1-1/2 inch difference between my upper bust and bust, so I've never done a full bust adjustment, choosing to make any adjustments once the dress is made. Maybe if I find a dress that I find has a lot of issues I might do this in future.

However, I have found that it is useful for me to grade from the smaller size at my upper bust for the shoulders/ neckline to the full bust measurement. I did this on the Anna as below:


This means that I get a closer fit above the full bust line. This dress therefore now fits so much better than my previous version (before all the adjustments). It's so comfortable to wear, and I added my favourite skirt on as well New Look 6723 , this is basically just a trapeze shape which I add pleats to once the bodice is made. In order to do this I stitch the skirt sides together, and pin to the bodice (with pleats sewn in) at the side seams.

I then find the centre of the bodice and mark, and the centre of the skirt and mark. Pinning these two centre points together and then up to the point of the pleat like so:


I then create a pleat from this point by folding over the excess fabric to the inside. I then do exactly the same at the back, but instead of folding the fabric under itself, I create a box pleat by bringing the excess fabric from either side of the pleat into the middle.

Using this method, I can ensure that the pleats on the skirt and bodice match up perfectly. Using this skirt instead of the drafted Anna skirt means I can have a big lunch and not worry about the consequences ha ha. Once I got the bodice right on this dress, I managed to make it up in 2 1/2 hours! I've now made two for friends and two for myself, I'm becoming a bit of an Anna obsessive.


I got the inspiration for this dress from a Cath Kidston one I saw that was navy polka dot with ric rac on the bottom, I really liked the style, though it's probably more twee than I would normally go for. I bought the fabric from ebay though and it has already started to fade quite a bit, so I may need to replace it soon. I've found it so easy to wear to work, I think another couple in some 'sensible' fabrics may be on the cards.


It looks like the back is quite gappy in these pictures, and there is a little bit of ease here, but the dress is so comfortable I wouldn't want to make this any smaller. My other version is in a slightly thicker material, so may have needed to be brought in. But I'll tell ya all about that when I post it!


Do you like the shoes? Definitely not sensible, I decided this year was the year of the shoe. They are the perfect way to feel dressed up, and Ive only fallen in them a couple of times! (I always fall over... even in flat shoes, no real reason just that the ground likes me) I think I want to get some more fancy shoes. I figure I dont buy ready to wear very often these days, so I can splurge occasionally.


Friday, 18 July 2014

Refashion Skirt

Certain ones of these posts are from quite a while back, I have such a backlog of projects that I can't quite remember the ins and outs of the pieces I'm talking about :-S But the sun is shining these days so I'm getting pictures taken, which was my main issue before.

It's not like the darkness in the photos really puts me off, I'm definitely not the worlds best photographer so a little bit of light is probably not going to make a huge difference to what my skills can manage. It's just that when it's light I feel like I can achieve things, I can be bothered to get changed, and sweep the garden, and maybe even change shoes. I never can be bothered to put on make-up, but I never really wear make-up so that would be kind of weird. Though I did for my last make and enjoyed it, I guess it depends on the day.

So anyway, here is my next project! This was a refashion project, I bought the skirt in a shop in Stockbridge. It was full length and I typically didn't take a picture of it before I started. But here's a pic of the finished project!


Just to confuse you, I took these before I changed my hair. The waistband was a little small, but it used elastic so I knew I could make it bigger. I unpicked the waistband, evened it out into a rectangle rather than a triangle... not my sort of thing. I added a full lining of white muslin to give the skirt body as it is a very soft drapey fabric (not sure what it is but it's lovely).


I kept the original pleats in the skirt, and shortened the length considerably. It is now a perfect sunny day skirt for work with a shirt (like in this pic) or at the weekend with sandals. It turned out once I made all this that the waistband was a bit too big, son of a gun!! So I just stitched the back together pinching out 2cm either side at the back waistband. At some point ill replace the elastic and then it will probably fit fine. 

That's it! Signing out


Sunday, 22 June 2014

Dino Kelly

Dinosaur fabric! Skirts! Hoorah! This is my first rendition of the Kelly skirt, and it definitely won't be my last. I took a lot of time over this skirt, and added in a couple of extra details to make it more faancy.


The waistband has stretched out a little unfortunately (it's a light blue/ grey teeny cord). I think I might add a little elastic, to the back of the skirt. The main fabric of the skirt is unpholstery/ canvas Cath Kidston fabric. It was pretty thick, and it makes the skirt a-line stick out really well. I did flat-felled seams on the sides, to make the seams lie flat.


I made piping for the pocket, and covered my own buttons. I love this fabric, the colours are amazing! 


And it has super deep pockets!


Not much more to saw about this skirt pattern, the instructions are easy to follow, and I'll definitely be making more

Monday, 14 April 2014

Mad Men Dress

Ah only fools post about challenges they've nearly finished... or some such sewing based idiom. I did finish my dress in time (promise) but a series of unfortunate technological events contrived against me and the pics weren't ready in time for the challenge showcase! Boo! Ah well ya win some ya lose some. What I won was an awesome By Hand London Anna, proud of how it came out in comparison to my inspiration... and although I missed the challenge here are some Peggy inspired pics.


Hard at work on my latest advertising piece
You can see there's a little bit of bagginess at the back still. I did struggle with the sizing on this dress, it came out far too big on the first go so I kept having to adjust. Ill have to go down a size or two for the next one I think. I also wanted to shorten the skirt pieces, but didn't do it in the pattern stage so made myself some little pleats. I love how they came out as I like a little extra material round the midriff. Anyway, back to work...
Hmm.. what rhymes with Coca-Cola..?

Here are some pics on Betty so you can see some of the details. 

Can you see my picture on the wall? It's the legend that is Captain Picard "Make It Sew", Data and Geordie have sewing machines... it's the best


And if you're interested, oooh look at the pretty insides. I used pre-made bias binding to bind the seams, and hair canvas around the edge to give it a nice standing out skirt. 


LinkWithin

Related Posts Plugin for WordPress, Blogger...