Showing posts with label Vintage style. Show all posts
Sunday, 19 May 2013
Storm Trooper Desert
This is our Storm Trooper blue desert, not much to explain really. We bought the cactii from a giant garden centre that has opened near my mum and dad, and I got the mini greenhouse years ago at the Gardeners World show in Birmingham. I love gardens, and gardening, and my sewing usually takes a back burner this time of year while I try and keep up with all the seeds and things that are ready at the moment.
I lined the base with a thick compost bag, filled it with compost and then placed the cactii (still in their pots) in between the compost, the cactus on the right was deadly! All I did was brush it and my whole hand was covered in tiny needles, I'm glad it's safely behind glass now. I then covered in the blue sand, and placed the all important storm trooper pride of place in his desert, he finds it very difficult to stand up.
This is now my favourite corner in the house, with the jellyfish from my previous post, curtains all hung up, and now a new lamp and lampshade which goes with the colour scheme in the room (instead of the red which Mr T was pretty attached to. More house things to come, including an in-depth look at my sewing room, the first room in the house that feels properly finished!
Friday, 3 May 2013
Me Made May '13
'I, Deborah of dfabrication, sign up as a participant of Me-Made-May '13. I endeavour to wear at least one me made item twice a week, posting the outfits on my blog at least once a week for the duration of May 2013'
I signed up for Me Made May! Possibly the hair that broke the camels back or some other such proverb, but I couldn't help myself. I'm trying to be much more involved in the whole sewing community and therefore So'Zo's massively popular challenge (where members wear one me made item a day for the month) seemed a good place to start. Of course, I haven't gone quite to that extent, mostly because of my four skirts, 2 dresses and 2 tops does not a months worth of clothes made. But I thought it would be a great opportunity to try and stick to blogging more, (which is why you can see I've added blogging to my pledge) and a way of finding inspiration for my next make.
And on to my first pic for Me Made May!
![]() |
| A fabulous pose I'm sure you'll agree... quizzical |
This is my second Mathilde Blouse, I loved the first one I made so much I started another immediately, worn with my second New Look 6128. You can't tell in this (rather badly lit) photo, but it's a sleeveless option. I'm so proud of this top, it's made of a chiffon-like mystery fabric (another pickup from my days at Abakhan). And I managed to get the tucks to be pretty darned straight! I've got a more in-depth post planned... But in the meantime Happy Bank Holiday Weekend!
I've got my embroidery workshop tomorrow, only one place left! I'm so excited, and nervous, and various expletives of feeling. Wish me luck,
Deborah
Wednesday, 2 January 2013
Another New Look 6128 Pencil Skirt... and a Happy New Year!
First things first... Happy New Year everyone!
Apologies for my lengthy hiatus from the blog, after the move away from Edinburgh, and our unsettled-ness (living with parents's) I have failed at putting anything online. First off I want to show you the last couple of projects I did before we moved, and then I'm going to over the next couple of days add some more projects that I did for Christmas pressies, which I haven't been able to publish for obvious reasons!
After the success of my burnt orange pencil skirt, I decided to do the same pattern again, because it fit so well... and because of the novelty of having a straight skirt that doesn't do that tightness around the thighs and bum which I don't like.
And here it is! It's in a dogtooth brown, and what Mr T calls Dragon tooth in brown on the pockets. I love this pattern, it came together really easily, and I haven't stopped wearing it for two months:
Apologies for my lengthy hiatus from the blog, after the move away from Edinburgh, and our unsettled-ness (living with parents's) I have failed at putting anything online. First off I want to show you the last couple of projects I did before we moved, and then I'm going to over the next couple of days add some more projects that I did for Christmas pressies, which I haven't been able to publish for obvious reasons!
After the success of my burnt orange pencil skirt, I decided to do the same pattern again, because it fit so well... and because of the novelty of having a straight skirt that doesn't do that tightness around the thighs and bum which I don't like.
And here it is! It's in a dogtooth brown, and what Mr T calls Dragon tooth in brown on the pockets. I love this pattern, it came together really easily, and I haven't stopped wearing it for two months:
Hope you like the pictures, I hope you've all had an amazing festive season, did you manage to get any crafting done? I've mostly been eating chocolate, but it has to be done ey?
Monday, 8 October 2012
New Look 6723.... success!

I have completed my wallpaper dress!
I learnt lots of things whilst making this dress, one of which being it doesn't matter how careful you are at measuring, you can still end up with a dress that's about 2 inches too big for you. I will take a note of this and (probably) end up making this in a size smaller next time. I think I've seen bloggers mention this problem before, have you encountered anything like this?
I'm still really happy with it though, I like the casual element that the slightly bigger size gives. But I'll try and make a smaller one next time, to see if I like that aswell.
In the picture to the left you can see me taking advantage of the pockets that I added to the pattern (all dresses/skirts should have pockets).
In these pictures you can see the shared garden in our Edinburgh flat...
and the light disappearing from it even though it's only 1pm in the
afternoon. I'm going to really miss this outdoor space, but I'm not
going to miss that it loses light so early in the day! Hopefully I'll
have a garden all of my own in our new house
Overall I'd say this pattern is easy enough to make, the instructions are clear, and there are no confusing extra steps to trip you up. However, it annoyed me that it didn't come out the size that it said it would, so it loses points on that score!
If you'd like one that might be a little more accurate, this pattern looks quite similar to the Peony from Colette patterns. There is a project on at the moment called a Sewalong, which you can join in to make your very own Peony, bloggers will take you through the process step by step and everyone can add in hints and tips for making this dress the perfect fit. I had already started my dress, so have missed out on the chance, but if you want to give it a go, click on the logo at the bottom of the page to have a look. Happy Sewing!
Deborah
Thursday, 4 October 2012
Finishing my crocheted Granny (Greens) Blanket
I have been making a crocheted granny blanket for about two years now, making up a square every now and again when I don't have a project to take to Granny Greens (a local craft group I'm involved in). I've never especially counted them and worked out how many I need etc, (or if I have I don't remember any of the numbers).

So now that I'm moving down South (and away from the lovely Greeners), I have started to crochet my blanket together. I'm not sure I'll have enough squares, but I need to feel like I'm progressing on this project or I'm likely never to pick it up again.

I chose navy to crochet the squares together, as I find black or white too harsh, and the blanket has so many bright colours that I thought the navy might offset this.
I asked GG's very talented Jen to show me how, and I have decribed below as well as I can the process. Feel free to add any hints or tips below if you're a crochet blanket supremo.
I'm assuming here that you have already made some granny squares and understand the basics of crochet. However, if you would like a tutorial on a granny square (I'm assuming Ill have to make hundreds more for this blanket), then please let me know by posting a comment below.
Finding the corner stitch: this is fairly simple, you need to find the right-hand (if you're right handed) corner hole of your square, and identify the stitch which is directly above this hole.
As you can see in these pictures, I have made this hole stick out a bit so you can see it more easily.
Start by creating a slip knot, then hold your two crochet squares together lining up the edges of each square (apparently there is a wrong and right side of a crochet square, but I don't know how to work this out and so have left this out).
You then put your crochet hook through the corner stitches of both squares (one after the other), and loop your wool over the end of these stitches (pic 2).
Now pull your crochet hook through both stitches, catching your new (navy) loop through as you go (pic 3).
Once you pull this through you should have two navy stitches on your crochet hook (pic 4).Now loop the navy wool over your hook above these two stitches (pic 5) and pull through the two stitches on your hook as you did in pic 3.
You should now have one navy stitch on your hook (pic 6).
In this picture (to the left) I hope you can see where the next stitch is for you to go into. This can be tricky, especially when you use cheap wool like me. But don't worry! If you get the wrong stitch, or miss the odd one no one will ever know.Good luck with crocheting your squares together, I'd love to see the finished effect.
Because I've been doing this on and off for so long, the size of my squares (and the quality) has varied wildly, and so I've had to be a bit off the cuff when choosing which stitch to stitch into (sometimes missing the odd one to make larger squares match smaller squares).
This probably will have an adverse effect on the neatness of the blanket, but if you like neatness chances are your crochet squares will all be the same size, and you won't have this problem.
The idea for my blanket however is to show my process of development, from the worst square to the best so I don't mind it being a little messy.
Do you have a treasured granny blanket at home? Or a project that shows your development as a stitcher? I'd love to see them!
P.S. Let me know if you'd like that granny square tutorial.
Deborah
Monday, 1 October 2012
New Look 6723... and my stupidest mistake so far
So! My first attempt at making a dress for about three years, and I'm making it from a pattern, and due to the success of my pencil skirt I am once again following the instructions.
The first thing I had to do was make an adjustment to the dress pattern. From my measurements I was a size 18 hip and waist, and a 16 top.
I'd like to mention here something that I'm sure people know but I want to put my two pence in. You have to measure yourself and use these measurements to choose your dress size. I'm usually a size 12 in dresses, and have fallen into the trap before of just going for it and making this size... only to find it is then three sizes too small. This is much more depressing than measuring your body, and matching this to the (clearly mental) sizings on the pattern packet. Do not be depressed! You have not put on 6 stone since you got up this morning, the pattern people just live in a strange bubble of sizing. So... rant over.
Back to the point, to match up the pattern pieces I just drew a line after the waist point, following the curve of the pattern piece as much as possible, starting from the size 16 line and ending on the size 18.
First to the mistake... I cut out my skirt pieces (the biggest bits of all) upside down! This was kind of irretrievable, I cut out new pieces in the end and had to buy more (stupidly expensive for my first go at this dress) material. I then cut out as many pieces from what I had left as possible, being a bit haphazard with the pattern, but at least not upside down. The next day when I cut out the skirt, I went back and started thinking again and doing things properly. I started by lying out everything I had on the floor to see where I was up to, how it was going to look etc. I recut my skirt pieces, matching up the pattern to the top piece (which the pic above does not do... I was going to attempt to use the back as the front... the pattern was far too higgledy piggledy). And then cut out my lining pieces. Everything was going to be ok!
Because of the trauma so far on this dress, I decided not to take any chances on the sleeve (which I've never done before... the sleeve, not take chances) so I made a muslin. Which basically means that I cut a sleeve out of cheap fabric, tacked it on to see what it would look like, and how sleeves work without ruining my fabric. This worked really well, as you can see from my pleased face in the picture.
I worked out from this where I wanted the sleeve to finish, as in seeing the sleeve on I thought the 3/4 sleeve might be a bit much with all that pattern. I marked this spot on the muslin and cut out my sleeve pattern pieces accordingly.
This is where I am up to so far! I'm so proud, and cant wait for my next challenge... a lapped zipper! wish me luck!
The first thing I had to do was make an adjustment to the dress pattern. From my measurements I was a size 18 hip and waist, and a 16 top.
I'd like to mention here something that I'm sure people know but I want to put my two pence in. You have to measure yourself and use these measurements to choose your dress size. I'm usually a size 12 in dresses, and have fallen into the trap before of just going for it and making this size... only to find it is then three sizes too small. This is much more depressing than measuring your body, and matching this to the (clearly mental) sizings on the pattern packet. Do not be depressed! You have not put on 6 stone since you got up this morning, the pattern people just live in a strange bubble of sizing. So... rant over.Back to the point, to match up the pattern pieces I just drew a line after the waist point, following the curve of the pattern piece as much as possible, starting from the size 16 line and ending on the size 18.
First to the mistake... I cut out my skirt pieces (the biggest bits of all) upside down! This was kind of irretrievable, I cut out new pieces in the end and had to buy more (stupidly expensive for my first go at this dress) material. I then cut out as many pieces from what I had left as possible, being a bit haphazard with the pattern, but at least not upside down. The next day when I cut out the skirt, I went back and started thinking again and doing things properly. I started by lying out everything I had on the floor to see where I was up to, how it was going to look etc. I recut my skirt pieces, matching up the pattern to the top piece (which the pic above does not do... I was going to attempt to use the back as the front... the pattern was far too higgledy piggledy). And then cut out my lining pieces. Everything was going to be ok!
Because of the trauma so far on this dress, I decided not to take any chances on the sleeve (which I've never done before... the sleeve, not take chances) so I made a muslin. Which basically means that I cut a sleeve out of cheap fabric, tacked it on to see what it would look like, and how sleeves work without ruining my fabric. This worked really well, as you can see from my pleased face in the picture.
I worked out from this where I wanted the sleeve to finish, as in seeing the sleeve on I thought the 3/4 sleeve might be a bit much with all that pattern. I marked this spot on the muslin and cut out my sleeve pattern pieces accordingly.
This is where I am up to so far! I'm so proud, and cant wait for my next challenge... a lapped zipper! wish me luck!
Sunday, 23 September 2012
Burnt Orange Pencil Skirt
I finished something! Hoorah! And here's a picture of our kitchen (which only fits one person) actually looking quite clean for once. I think I could give The Little Paris Kitchen a run for its money.Out of my entire giant list of things for last weekend, I feel I did very well by actually completing a project and not getting distracted, attempting to do four and achieving nothing.
However, I did only finish one project, but it was totally worth it. I made a burnt orange pencil skirt for the winter, and it fits both my waist and hips. Something I have never found in the shops, even when I was teeny tiny. I'm really starting to believe I can sew clothes.
I always used to give it a go, but never paid very much attention to the pattern, or ironed anything, so it was never quite as pristeen as I would like it. The sizing would be out, or I'd have made something up ad hoc and it would go wrong.
Not that I haven't done that in this project... but I'm getting better at it maybe? As you can see in this post, the skirt is a remake of a remake, a hack job I did on a skirt that was several sizes too big. I unpicked all the side seams and recut the pieces from my pattern.
Something to do with me leaving the back zip in instead of re-doing it meant that the waistband fell just short of the right size, so I bound the raw edge with navy bias binding. I think I got away with it, just. But now I know when I make the pattern from fresh that I might add another inch to the waistband just in case.
I also made belt loops, which came together very quickly and easily. Unfortunately when I was stitching them into the waistband, it seems to have pulled the waistband closer together (I should probably have basted alot more?), if you've got any tips on how to avoid this in future then please let me know!
I added in tartan panels for the pocket pieces to add contrast (and because I ran out of material) and added in the belt loops in tartan to keep up the theme.
When I did the top stitching on the pockets, I did it in navy to tie in with the pockets.
I learnt something new on this project too, understitching. When I read the description of what this was on the pattern, as usual, it all sounded complete gobble di gook, so I looked up understitching on google, and what should come up but the lovely Colette of Colette Patterns. Her instructions here, were clear and easy to follow with pictures (v. important to a person like me who gets all those words confused in their head). I was very pleased with the results, this makes the fabric not roll out revealing the navy lining.Overall, this pattern worked really well. It was easy to follow, and fit me to the dimensions that it said on the packet (not always something that actually happens). I'm still learning, but feel like I really made progress with this, and haven't stopped wearing it since it was made! Any projects you're particularly proud of at the moment?
Deborah
Thursday, 20 September 2012
September success
The September weekend was a success! I finished a whole
skirt, very proud of myself for actually finishing a project. And I'm itching
to share it with you, but unfortunately Mr T took the final pictures with his
camera, so I’ll have to wait until he has a second to put them on the laptop.
In the meantime here’s a sneaky peek. This picture makes it look like I play guitar... in fact I'm far too lazy for all that learning... I took the guitar off Mr T so he could take the picture, obviously wasn't paying enough attention to put it down again.
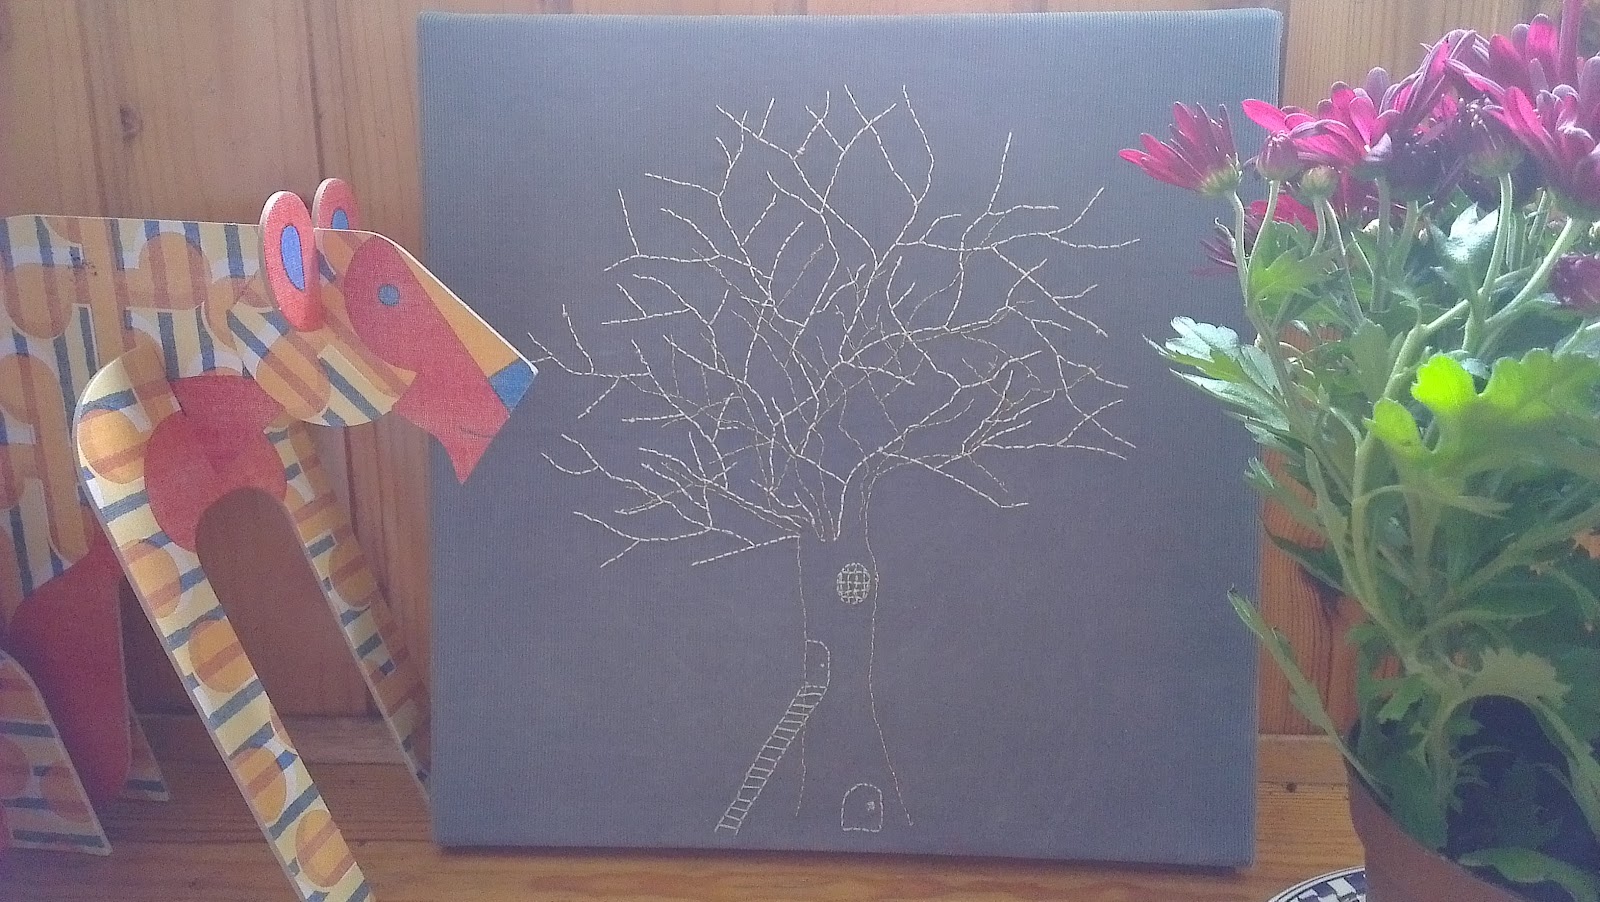
I also attached the embroidery below (which I finished ages ago)
onto a canvas. The little art shop in Stockbridge is having a sale on canvas,
and it occurred to me that this was the perfect forum for my embroideries. These
usually hang around folded up in a ‘to be completed’ pile because I can never
decide what to make them into when they’re done. But I’m really happy with how
this came out, and think I’ll do it again with any new embroideries.
It’s easy to do, I used metal drawing pins, pulling the
fabric tight over the canvas and hammering it in at the centre of all four
sides. I folded the excess fabric at the corners over, and hammered that in
place. Then I added in pins wherever it looked like the fabric was loose. Ill try and take
pictures the next time I do it. I was sorely tempted to buy a heavy duty
stapler for the occasion (something I’ve wanted for ages) but resisted
temptation (for once), sticking with the drawing pins I already had in the
cupboard.
Saturday, 15 September 2012
September Weekend Projects
Working for the Council has some benefits, the best of which is the Midlothian September weekend. I have a four day weekend to play with, and for the first time (probably since we moved up) we don't have visitors!
The original plan was to make a practise version of my wedding dress (above left), but with the prices of fabric up in Edinburgh, and the amount of fabric needed for my first draft pattern V1094, I decided to get a pattern with a little less fabric. So I chose New Look 6723, and a beautiful vintage wallpaper-esque navy blue fabric. I think I need the most practise on the bodice, so went for a basic one to start with, to work my way up. I'll keep you posted with progress on this one.
The project I've first started is a re-working of the orange skirt (in the centre of this picture), when I first bought this skirt it was a number of sizes too big for me. So I did my usual job of taking it apart and adding a couple of pleats. It sort of fit, but having lost a little weight over the summer, it has just become unwearable. So I've gone back to basics, taking all the seams apart, and making the pattern pieces from New Look 6128. I ran out of fabric to do the waistline, so I've added in some dark green and blue tartan as the pocket pieces, adding some contrast. I think it works, but will have to wait and see if I wear it when it's finished.
You've seen a variety of pictures of my flower embroidery, and I'm coming to the end of finishing it. So I bought some teal pom pom trim (my favourite kind of trim) and I'm going to add it to the edge of the pillow/ cushion to make it slightly more cushion looking (hopefully). Also, Im thinking it needs something a little more in the main area of the cushion, feels a litte white to me. I've got some plans for how to fill this in... watch this space!
Obviously I have taken on way more than I can do in this weekend, but it's quite nice to have exciting plans ahead. Ill update you soon with my progress!
Deborah
The original plan was to make a practise version of my wedding dress (above left), but with the prices of fabric up in Edinburgh, and the amount of fabric needed for my first draft pattern V1094, I decided to get a pattern with a little less fabric. So I chose New Look 6723, and a beautiful vintage wallpaper-esque navy blue fabric. I think I need the most practise on the bodice, so went for a basic one to start with, to work my way up. I'll keep you posted with progress on this one.
The project I've first started is a re-working of the orange skirt (in the centre of this picture), when I first bought this skirt it was a number of sizes too big for me. So I did my usual job of taking it apart and adding a couple of pleats. It sort of fit, but having lost a little weight over the summer, it has just become unwearable. So I've gone back to basics, taking all the seams apart, and making the pattern pieces from New Look 6128. I ran out of fabric to do the waistline, so I've added in some dark green and blue tartan as the pocket pieces, adding some contrast. I think it works, but will have to wait and see if I wear it when it's finished.
You've seen a variety of pictures of my flower embroidery, and I'm coming to the end of finishing it. So I bought some teal pom pom trim (my favourite kind of trim) and I'm going to add it to the edge of the pillow/ cushion to make it slightly more cushion looking (hopefully). Also, Im thinking it needs something a little more in the main area of the cushion, feels a litte white to me. I've got some plans for how to fill this in... watch this space!
Obviously I have taken on way more than I can do in this weekend, but it's quite nice to have exciting plans ahead. Ill update you soon with my progress!
Deborah
Friday, 7 September 2012
Embroidery Workshop

I'm running an embroidery workshop on Monday 10th September for my co-organised craft group Granny Greens. It will be a beginners course, providing all the knowledge you need to be a whizz bang freehand embroiderer.
I'll be providing my knowledge, and the knowledge of wiser others for the teeny tiny fee of £1.50 for materials! For some great hints and tips before you get there, check out Wild Olive . There are some lovely illustrations in this series of posts, which are very simple, colourful and easy to follow.
I'm buzzing with ideas for the workshop, and would love to hear yours so get in touch! @DFabricate or leave a comment below.
For more details on the workshop, or what we do at Granny Greens click here.
Hope to see you there! Deborah
Subscribe to:
Posts (Atom)


