Showing posts with label Green. Show all posts

Friday, 3 July 2015

Red Gertie Hack

Happy Friday everyone! We've been having a heatwave here, I bet you're bored to death of hearing about it by now. Last night the humidity broke and it poured it down, so today it's a beautiful day with a light breeze, perfect. I've been getting a lot of sympathy due to the heat, which is lovely. However, the office isn't actually that hot it's just walking about that is warm, I am running low on work clothes now which I'm going to have to rectify sometime soon... in all that free time I have (?!)

I finally got a free evening to try and go swimming last night so off I trotted to the aquatic centre to give it a go. Mostly I went to feel the weightlessness of the baby in the water, as it is amazing! So I mostly just floated (whilst trying not to get in the way of the super serious guy who decided to swim fast in the slow lane that me and a lady were happily occupying). I was a bit surprised when I got out of the pool and felt the weight I'd been carrying around, no wonder I'm so slow getting about.

This top... no longer fits. Neither does the skirt! Ha ha! It's under a little bit of strain in this picture, and it only got worse I'm afraid. But I absolutely love it and can't wait to get it out of the wardrobe post-bump. 


The original pattern that I started from was the Gertie vintage blouse. I know there's actually a blouse really similar to the one that I made in the book, but I'm lazy, and as I'd already traced off the one below I just made changes to that. 


I scooped out the neckline, left the sleeves as they were and left out the large darts at the sides. I also left out the button closure at the back as I wanted this to be a very simple top. I was left with a roomy, comfy plain top. 


Construction on this was crazy simple, I followed the instructions for the BHL Anna, whereby you stitch the shoulder seams together first, hem the sleeves, and then hem under the arms. This means that you don't end up with tiny arm holes to hem all the way around on a delicate fabric, hooray!


PGP Update: I overdid it with the holidays (mixed with a bunch of unusual/ uncomfortable beds) which meant I was pretty sore last week. However, I saw the physio on Monday and have been much better since. I had my first full week in work this week, without having to work from home once!! As a note on what happens with PGP, just look at how crazy misaligned I was at this stage!! (This must be over a month ago now) Look at my shoulders! This is me thinking I'm standing straight, no wonder the physio said, ooh yes you are quite twisted ha ha!

Those of you with amazing memories may remember I talked about the embroidery on this blouse in my Sew magazine column a while ago. The plainness of this top made me want to add a little something, as you know I struggle with plain. Instead of trying to make flowers with any fancy stitches, I freehand drew the design I wanted onto my blouse and stitched this in tiny back stitch, sometimes simple is best. 

If you'd like to learn the art of embroidery, then come along to my next class at the ministry of craft, new dates to be published very soon. Ministry of Craft


I reinforced the section to be embroidered with silk organza, which worked perfectly, however I should have zig-zagged the edge of this as it has frayed as you can see here.

The neckline has also been faced with bias binding for a clean finish on the inside. I love bias binding, I know everyone says that but this a true and deep love that dares speak its name. It just makes things like this hack, (where I have drafted the neckline) so much easier as you don't then need to draft a co-ordinating neck facing.


I hope the weather holds for you this weekend, I'm going back to Blackburn for a family do and also going to a Brian Cox stars talk type thing on Sunday, looking forward to it! Though... not sure what happened to 'I'm definitely done with going anywhere' ha ha. Apparently I don't believe in taking it easy. 

Side note: my ankles are massive, that is all.

Tuesday, 21 April 2015

Spring Washi - The sunshine is here the sunshine is here!

How are we all this fine day? I was working from home yesterday as unfortunately I'm now suffering from a thing called PGP (I think it's this... I'm still waiting on a doctors appointment) which if you're interested is something that happens to pregnant ladies. If you would like more info, click on the link. Basically it means that the more I walk the more pain I am in, so I've had to not move from a chair for the past couple of days.

As I'm sure you can imagine, this is horrendous when you're like me and love to sew, and see people and pretty much do anything other than sit on your bum (not that I don't love a bit of loafing but everything in moderation right?) So inevitably my brain is on overdrive over the things I could be doing.

Luckily I have a wonderful husband! The ivy from the great Spring Clearing of 2013 had started to grow back, you can read all about the first time I pulled it all down here.

It lasted a single year before the ivy started to grow back, and by this point it had grown completely all over the walls and fences again (though thankfully not quite to the extent that it did the last time). What I didn't realise the first time is that I am crazy allergic to this type of ivy. If it touches my skin I come out in a rash, and the rash spread all over my arms and up my legs. It was a really intense rash to be honest, pretty gross.

So! This time round my wonderful husband did it for me :-D I bought him a pair of shears to help speed the process along, but turns out all he needed was one judo chop!


Judooooo Chop! I am mightily impressed, we've managed to get most of the ivy in the green bin, and I think most of the plants survived the light trampling. Can't wait to get out there again, and start to see the flowers blooming. 

So! In honour of all things spring like, I have sewing to show you: The Spring Washi


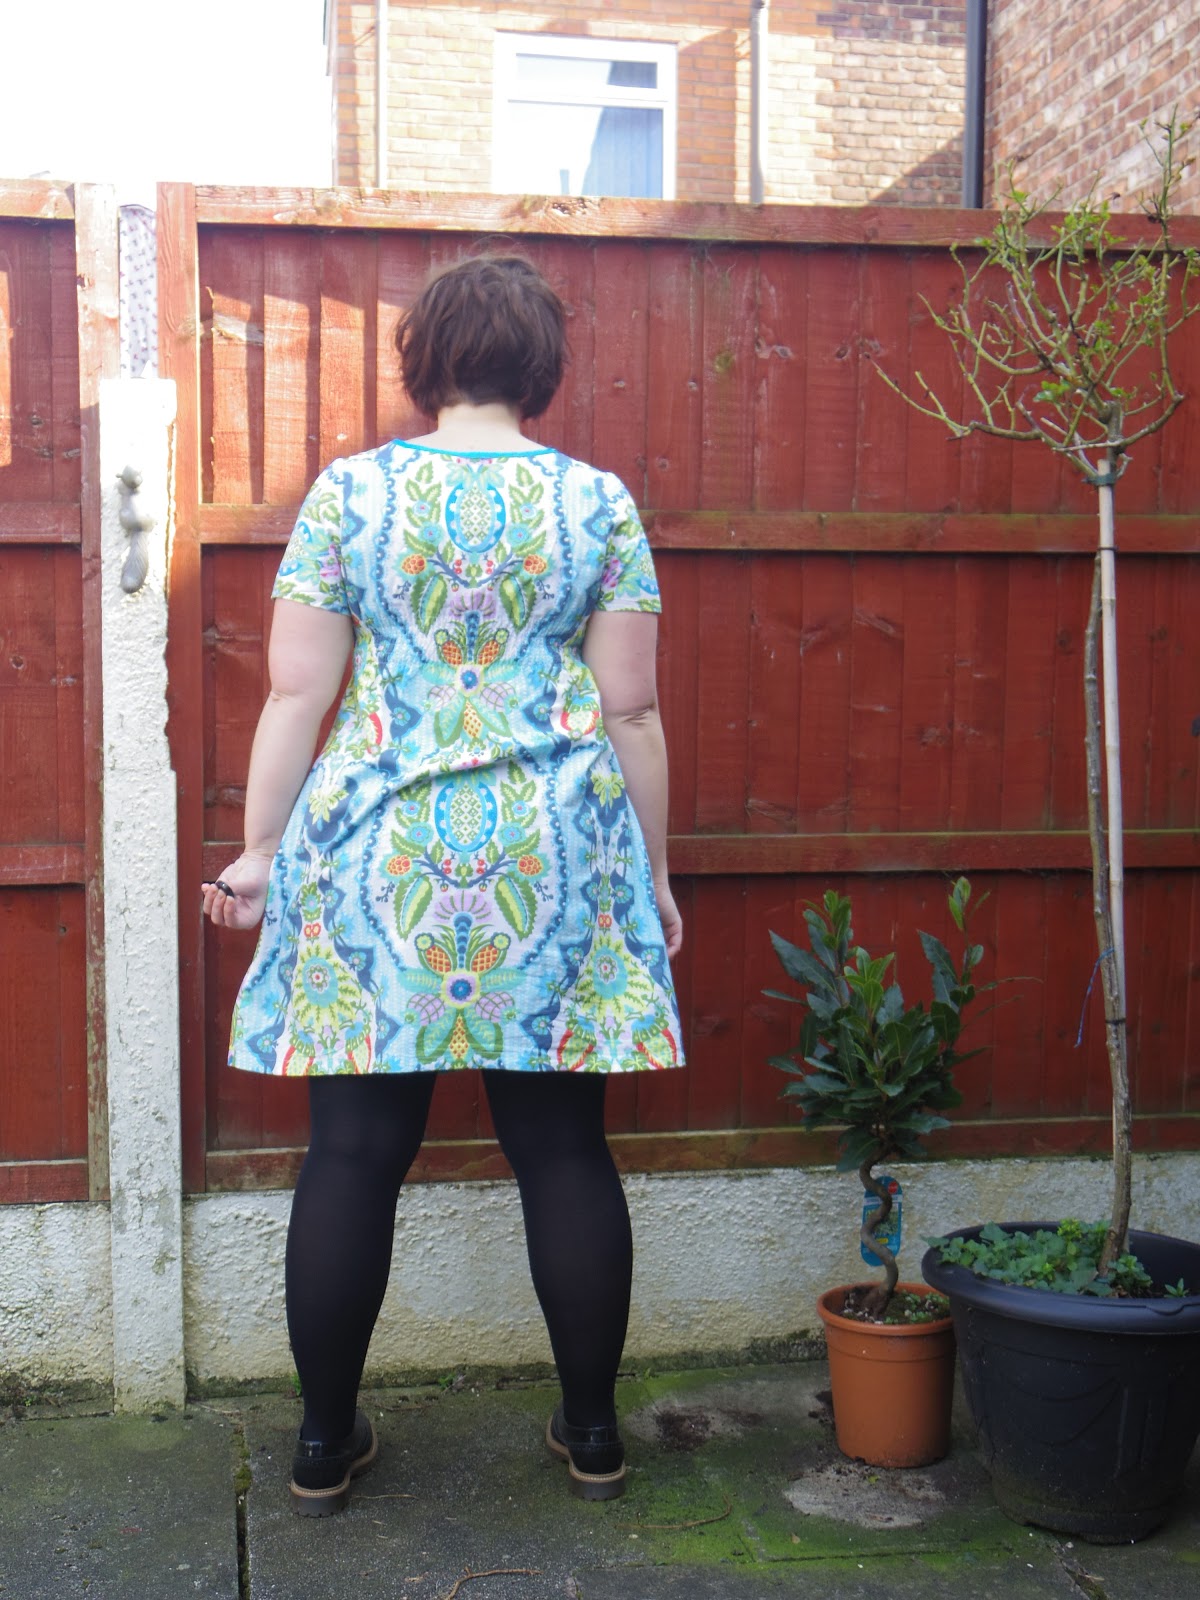
I made this in January, when I really needed to feel like Spring was coming, and I wouldn't be cold forever. When I first cut the bodice I stupidly assumed that the fold in the middle of the fabric would be... in the middle of the fabric ha ha. So the very specific design was slightly off centre. I only had so much of this lovely fabric but I managed to piece back together the centre bodice from off cuts. hence the lovely satin piping at the under-bust. It is there to distract from the fact that the bodice and the skirt don't actually pattern match (sshhhh)


I got this beautiful fabric from Matt and Neela, when they came to stay with me last year, along with the rest of the gang. Wow! Was that last year? We need to do that again guys! so props to them for their awesome choice in fabric. 


I didn't have any pictures of the back without that big fold in the fabric. I promise it's not always there, just my booty getting in the way ha ha. 


The sleeves are drafted from the Cami sleeves that I made in the great shirt make-over. But I will save that adaptation for my next instalment of 'adaptation and alteration'.

On Saturday I did a demonstration at Abakhan (from my chair). It was really fun to meet and greet people, have a good natter about the show and what they were sewing. My favourite thing is helping people with new techniques, and I showed them all sorts throughout the day such as hong kong seams and invisible zips. Everyone loves an invisible zip! If I had just demonstrated those all day then I think everyone would have been happy. Have a good week guys, I've got my fingers crossed for slightly more walking about.


This week:

You can find my shiny new column in Sew magazine, learn all about my wedding dress and what I've been up to since the Sewing Bee

Thursday, 11 December 2014

The Fantastically Generous Bloggers Shirt

I had a week off from le blog last week, sacrilege I know! But as you may know from my previous post, I started a new job and as we are on the countdown to Christmas there is just so much to do! I've been bringing a few things together, including some ideas for my secret santas. I decided to take part in two this year. One by A Krafty Kat, the one that I took part in last year, and have grand plans for my pressie. Also I have taken part in a newer crafty secret santa by Stitched Up from the Start I've got a great person and can't wait to get it all wrapped up and sent away.

How has your week been? Mine has been good, the new job wiped me out for the first week, lots of meeting new people (even though I've only moved down the hallway) and wrapping my head round a whole world of new acronyms. But I'm feeling good about the move, and can't wait to go to my (two!) Christmas parties.

When I got this new job, I started to think about getting some more work appropriate clothing. I would say that work clothes are one of the things that I love most about making my own clothes, I think I might have mentioned that in my Washi post. I want something that shows my personality, can be dressed up or down, and is layerable (because I sit on an air vent... not as exciting as it sounds). The photos in this are terrible, you can probably tell that yourself but I thought I'd mention it, sometimes it's either terrible pics or freezing pics while your neighbours watch you whilst clearing a garden. I went with bad pics.


Enter my Pauline Alice Cami Shirt

I got the buttons, and lovely... especially bad photographed bias binding from my secret santa last year, I snuck in under the line for making this before the next Christmas! This lovely packet came with instructions, I was to make a shirt. I hope I did you proud Santa!


Unfortunately I didn't find a place for the light blue ribbon, but it awaits in the stash for the perfect project. 

The detailing comes from another lovely bloggers de-stashing from the 2013 Birmingham blogger meet-up, unfortunately I didn't make this years... I was hungover (to my eternal shame). But hopefully it will be on again next year and I can tag along because it was a brilliant day. I got the following material from Amy of Almond Rock, in the great de-stash/ swap, and added it to cuffs and collar.


The shirt is a little tight in the back (see slightly unflattering picture below), I did widen the sleeves as per the adjustments I thought of from the Zig Zag Cami, including a wide shoulder adjustment, which did work as the shoulder seam now sits comfortably on the edge of my shoulder. However, I don't think I widened the arms enough and that is what is causing the tightness. On to the next version!


I bought the skirt in this post from a charity shop in Edinburgh when we lived up there, it had weird little tacked on badges of squirrels and owls, which I removed. It's a great skirt for walking up a hill, or going to the office, and is super warm for chilly knees. The lining was recently falling apart so I attached a new lining to the inside of the skirt, using the edge of the old lining to stitch to.


I love a colourful lining, this was another purchase from the blogger meet-up... there have been a few things languishing in the cupboard for a while ey? Feels good to be using up the stash.

Overall I'm very happy with this shirt, this pattern is on its way to perfect, and once it's right I have so many plans for pattern hacking. I'm very excited!... but should get back to making Christmas pressies. Selfish sewer? Who... me? Hope you have a great weekend.

Debs


Thursday, 20 November 2014

Purple Raincoat

I did it! Woop! As you can tell I was pretty excited to finish this coat, it is made from a laminated fabric, so it was pretty difficult to manouvre through the machine, but it was totally worth it.

You may remember from my previous post that I made a pattern from an old coat, taking this apart and tracing around the pieces. You can see that here.


A couple of adjustments I made to this pattern were to omit the collar, and replace with a hood. The original coat had a hood attached by buttons underneath the collar. But I never took the hood off, and the collar got in the way of the hood so off it came.


This meant I had to draft the hood as I wanted one that was a little deeper, I hate when the wind picks your hood off your head in the midst of a downpour.


I used a heat activated waterproofing tape to seal the seams, it was a little difficult to get the temperature correct. Some of the tape melted, and some of it didn't attach, but I got there in the end. All I can hope is that it's still ok in there!

The pockets were attached on to the outside, I used the lining piece from New Look 6128. I lined the pocket pieces and then top-stitched them on. I rolled the lining into the centre, so you would see very little of it on the outside.


The seams have been stitched using flat felled seams, this stitches the bulk down on the inside. The triangular pieces at the back and front yoke caused a bit of a headache, but I found that if I snipped off the edge at the point of the triangle, stitched down to the point, and did the same for the other side (rather than leaving the needle in and pivoting) it all went ok.


Oooh shiny green lining. The lining was a little bit complex, I haven't lined a jacket successfully before so I didn't really know what I was doing, but I muddled through. I began by attaching the hood lining to the top of the back facing. I then stitched through the hood to the facing, to secure it in place.

I stitched the sleeve lining pieces to the end of the sleeves right sides together. I then attached the lining to the facings, inside out and stitched the sleeves to the main lining. This meant I had the raw edges of the sleeves showing where I attached it to the main body. I could have had stitched but  was feeling under a bit lazy at the time so I hand stitched bias binding to cover this seam. I then hand stitched the bottom edge of the coat together.


A mistake I made was to put the button holes on the man side of the coat, but you know you win some, you lose some. Feels very odd trying to the close them up on the wrong side though.... as my face shows here.


This definitely counts as a completed challenge, I'm so proud of the coat. It is a spring coat really, I wore it for a week but it was pretty chilly, and a little sweaty in there on a hot bus. Can't wait for the spring! Look here's a dance... do you reckon it will make the spring come early?

Saturday, 21 December 2013

Accessories and Venue


The veil, I wanted to buy my veil by the time I had finished the dress, I was tired to be honest and a bit wiped out with all the other making we'd been doing. Unfortunately we couldn't find a nice one under about £100 so out came the sewing machine! I mean veiling is about £5 a metre for goodness sake.

To make the veil I picked up the 1 1/2 metres I had bought, clipped it to my head with a kirbi grib and marked on where I wanted it to end. I then led it out on the ground, cutting off any excess. I then folded it first in half lengthways and then downwards, and rounded off the edges. I looked up how to make one online but couldn't really grasp their instructions. But once I had the fabric laid out the material all became clear.

I had made the flower for my bouquet but as I had two it was making the bouquet unbalanced, so I used it on the veil! I used a variety of lace including that used in the wedding dress, and then attached a small veil comb underneath. To finish the edges I used 3metres of ivory lace trim, just sewing it flat onto the raw edge as veiling does not fray.


The bouquets were a joint effort between my mum and me, the two at the bottom were made using the excess off the bottom of the bridesmaid dresses so as to match my beautiful bridesmaids! The leaf you can see poking out of the top one is a felt cut-out of a leaf I picked up when Terence and I got engaged. I knew there was a reason I was so sentimental!


Here you can see a sample of the (over 100m!) of bunting that we made for the wedding. My sister and I cut out the majority of the triangles (with some help from Mother in Law), and my Mum sewed basically all of it together herself. Don't know how she managed to keep going, it was amazing! We used all sorts of colours and designs, trying to stick mostly with the blue and green but adding in the odd galaxy fabric to keep things interesting!

One of my favourite elements of the decoration were the centrepieces, they were made with hand-made flowers, spray painted candelabras, dinosaurs and animal toys and a whole mess of help from all of our amazing friends and family. Thank you to you all, I'll leave you with the pics as they tell the story of their construction better than I ever could.


You made it through the wedding posts! Well done! Just wanted to add a quick note to say thank you to everyone who helped us with this. It was the biggest thing we've ever done/ will probably ever do again. Thank you to all those who had a hand in our wedding, whether you made things, or just listened to us gripe for months on end about all sorts of nonsense. We love you guys! You made our day what it was.

Saturday, 14 December 2013

Wedding Invitations

So it's been a bit wedding dress heavy over here in my last posts, so I thought I'd give you a break, and you can see me and Mr T's joint effort on the invitations. All of the drawn elements were done by my super talented husband (so weird to call him that still), you can see some of his drawing skills here. And all the embroidery/ fabric elements were me :-)


Hope you like them! We love them, I want to put them up all over the house. Maybe I'll have to settle for just the one.

Sunday, 8 December 2013

Finishing the wedding dress


So I'm going to jump right in to the technical biz here.

The lace overlay was constructed using a lace top that I already had, I was looking for a pattern without separate sleeves but struggled to find anything! Is this something that just doesn't exist? Have you got one? Not that I really want to know as it's a bit late now ha ha.

So anyway, I decided that something I knew would fit was the next best thing. I began by ripping through all the seams of the lace top, (so much black thread!)

With regards the gathering at the sleeve head, I first marked where the gathering began and ended with white tacking thread.


I then used these markings to construct the templates above, tracing around the pattern pieces of the black lace top, and transferring my thread markings on to the pattern piece. In order to negate any stretching and distortion of the pattern piece which may have been caused over time to the top, I then halved my pattern piece, and laid one side on top of the other matching the sides.

I traced over both of these, smoothing out any differences on either side, and cut out a new pattern piece based on this tracing, and came up with the above!

I used this tracing techique to create the bodice pieces as well. I knew the finished bodice of the dress would be at my natural waist, so marked this on to the bodice piece as I went along. Also, on the back I added the Mathilde blouse button plackets, I knew the size of these would work with the buttons I had chosen, and as I had made the Mathilde before, I knew I could follow the super detailed instructions online. Once I had constructed all of this, I added two big gathered rectangles for the skirt and I was almost there!
This is the first pic of nearly done dress I sent to my Mum and Sis halfway through, as you can see it's not the most flattering pic of the dress. But I was so ridiculously excited to see a dress appear! A few changes I made as I went along were to broaden the neckline to something a little more open and flattering, I used french seams on the sleeves which I thought would be really confusing but was actually quite straight forward (I'll try and do a specific post on this the next time I do some).

I added the green/blue silk as a centre band at this stage as I realised I needed something to break up the white of the dress. I had never intended to have a solely white wedding dress, and this piece helped to break up all of the white that had somehow occurred :-)

I realised once I had done this though that it needed something a little special, some bling if you will (and you will). So I found this one online: 

Copyright Nikki Rodgers 
Isn't this pic gorgeous? It was taken by my super talented sister Nikki. If you want to take a look at some more pics of me in the dress, and some great shots of me and Mr T with umbrellas and wellies take a look over on her blog.

So that was that! Dress made, I can't believe I made it in time, though there were a few things I hadn't done yet once I'd made the dress. It kind of went like this, I made the dress! Yay! It's done! Woop!

Oh wait.... I need a veil, and shoes, and what do I wear on my nails? Am I wearing tights? I do really need a haircut.. arg! Ha ha, obviously the dress had taken priority for a while there.

Next time, accessories!

LinkWithin

Related Posts Plugin for WordPress, Blogger...