Showing posts with label Pauline Alice. Show all posts

Sunday, 1 November 2015

Birthday Xerea

Hallo, How are we all? I am doing well, tired but well. Little E went through a stage of sleeping for long periods of time recently. They call this sleeping through, it's not exactly a whole nights sleep but it's certainly better than nothing.

However, last night she was restless from about 2.30am so I'm pretty tired! However, I am very much enjoying baby time. We've been going to groups in the local area, I've met lots of lovely mums and am beginning to feel more like myself. I am however both an introvert and extrovert (I always come out exactly in the middle on those personality charts), and though I am getting lots of quiet time, it is not truly relaxing alone time. I'm not sewing or chilling, taking a bath or being calm. I am keeping active, trying to fill Baby E's day with interesting things which is its own kind of exhausting.

That's why when Mr T takes the little one out for an afternoon, it is the most relaxing time I can have. My shoulders relax and I feel like myself for a little while, and I get to sew! I've made a couple of things this way, and will have those to share with you in the future.


For today, I want to show you the last piece of sewing I did before Baby E was born. A birthday dress! At the time I was struggling with understanding what to make for breastfeeding, and had been making bigger and bigger maternity clothes. I was fed up of constantly making the same thing and was itching for a different silhouette. When I saw the new Pauline Alice Xerea pattern it answered my prayers, a completely different silhouette, but it looked like I could fit it over the big ol' bump.


I bought this fabric at the knit and stitch show that was on at the same time as the Sewing Bee, I walked around with Ryan and chatted with lots of enthusiastic people who commiserated with us, and told us all about their sewing lives. It's one of my favourite memories of that time, and now I have a dress that represents that time for me. 


Because I had such a big bump when I made this, the skirt seemed pretty short, so I added the gather panel at the bottom. To make this more of a feature I added lace along the edge. I'm not sure if it has now made it a bit long as I'm no longer bumpy, but I think I need to wear it a couple of times more before I decide. 


When I printed it, it was wrong by about 1cm off, so I tried to adjust it. I shaved 1cm off the pattern on all pattern pieces, but it wasn't the most accurate of adjustments, so I think the yokes at the top are a little too wide for my shoulders and neck. So I'll probably reprint the pattern for future makes just to make sure I get it right. 

Well, Baby E is making those... I'm not sure if I'm happy or sad noises so that's my cue. Hope you're having a lovely weekend guys, happy sewing!


Sunday, 5 July 2015

Manic Shopping Confession

Dear readers, I have a confession, I have a bit of a shopping trigger finger happening, I'm buying fabric left right and centre, there have been a flood of new patterns over the summer and I want them all! Want to see into my over-filled mind?

I want to make a turia dungarees variation with a skirt (because who am I kidding with that shorts malarkey?) 
I want the Pauline Alice Xerea, I think it will make an amazing showcase for jazzy fabrics, and is a new silhouette to all the fit and flare dresses in my stash. Also, how amazing would it be in blocked light and dark blue chambray?


Speaking of fit and flare I want Sew Over It's new vintage summer dress. I've been looking for the collar variation everywhere and as you may have guessed I'm a bit obsessed with shirt dresses. 


I also want to sew something with a waist, I love my bump, I'm really enjoying my shape.... is it possible I'm bored of the washi?! Surely not! I think I just want something completely different, like the Hollyburn. I really want the Hollyburn! Though not especially seasonally appropriate, I'd probably want it in wool but I've been drafting skirts that are similar to this for ages, but with little pleats. I'd love to have a pattern for this style.


And then there's the stash of fabric... I usually buy too much fabric per project, and so I end up with excess. I have now reached the stage where my excess is reaching epic proportions. I don't want to do anything with this leftover stuff, I've already made what I wanted, but I can't throw it away. All I can think to do is patchwork blankets, and I can't really be bothered. I've already made a cushion for the nursery chair, and I love it. But patchwork has never really been my thing and when I contemplate cutting one hundred rectangles it makes me want to cry.

I also want some classic washis, with the little cut out like my first ever one in some cotton sateen. I'm running out of work clothes, though I'm running out of days where I need to be in work so that shouldn't be an issue for much longer. How am I supposed to resist these fabrics? (Side note: I did not resist these fabrics).


Maybe it's because I haven't been able to sew for so long. I got the sewing room into a complete mess before all my trips away, I feel guilty if I'm not sewing for baby (count the baby clothes... 0) I'm sure once I get going with it I'd enjoy it but at the moment I just don't really wanna. And last weekend the sewing room was converted into a nursery with all my stuff being put into corners around the house, there is so much stuff!

I think I just need to take a step back, calm down and sew something. Once I get back in the chair I'm pretty sure I'll stop behaving like a maniac. All I need is time, but I'm quickly running out of that!

Tuesday, 16 June 2015

Washi Cami Sixties Inspired Day Dress

Good day to you guys and gals! Hope you're all doing well, the past couple of weeks have been a bit crazy with last minute flights, trips to Birmingham and London, and this weekend we're off to Scotland. Who says pregnant ladies need to relax?!

To be fair I have done myself a bit of damage trying to do too much so am working from home today. I can't tell you how amazing the flexibility of my new job has been, I'm not sure I would have survived this long without it. Though sitting on the comfy seat does seem to make baby want to press his head against my rib.

Did you take part in Me Made May? It's all over now... and has been for a while ha ha! I had a fantastic time this year, and actually made it all the way to the end, which is the best I've ever done out of three years of taking part. You can see my pictures on my instagram account. What normally happens is I'm really enthusiastic at the start and then slowly lose enthusiasm for it all and go silent. But this year I managed to stick to the documentation as well as (generally) wearing a me made item a day. That was my only goal, to stick with it so I'm really happy I managed it. Next year I'll try and take a pic a day, but this year I'm just proud to have finished it. No sweeping statements about what I have learned about my wardrobe for as you can imagine the only thing I learned is that my belly is getting bigger and there's not much I can do about that!


So this dress is another Washi make over ha ha. Once I find something that works, it's very difficult to sway from the path, I jsut make hundreds of the same type of thing until I don't want to make it ever again! In this case it's a good thing though especially as it's important these clothes take me through to the end of my pregnancy. This is a hybrid of the skirt from the Washi by Made by Rae and the bodice of the Cami by Pauline Alice.


I used my fully adjusted Cami bodice that you can read about here. I've still got another post to do for that series, but I've covered all the fitting adjustments now, now I just want to show you all the different versions I've made!

Instead of having the bodice its full length, I scooped the bottom of the bodice pattern to the length of the Washi bodice, following the shaped curve. This means that the bodice is now the right height to accommodate bump.


I then used the back piece of the washi pattern, laying over the cami pattern to create the correct neckline and armholes. To ensure a comfy fit I left off the shirring elastic and replaced with fabric ties. It makes for a bit of a creasy ripply back, but it's so comfy and not everything has to fit to within an inch of its life ey? Ha ha. Oops, just spotted a loose thread on the bottom of this skirt. I don't think I've ever made anything where all threads are well trimmed.


Argh! Giant face! I wanted to include this to show off my collar. Every time I make this, the collar gets a little bit better, I'm still not the neatest sewer, but i'm getting better! Also, just look at that pattern match across the seam! So proud.

I think I managed ti avoid the points on this design falling exactly over my nipples, they are pretty close, but they did have to go somewhere, so I'm not worrying about it too much.


I don't often make clothes that fit well into the bracket of a certain decade, but this is definitely sixties, the design of the fabric, the fit of the skirt and the style all come together to make one heck of a sixties day dress. I feel pulled together and yet comfy, so important with Spud getting bigger. I think I'd like a fleet of these for post-baby clothes so I don't feel slobby when I'm comfy. Not that I can slip into the jeans and top routine as I don't own any jeans ha ha.

Again, these photos are from quite a while ago, so you'll have to take my word on the size of the bump, but it's getting pretty big!


What am I up to?
Have any of you got your tickets for the handmade fair yet? I'm going to be doing a workshop! So excited, some of you may remember that I (and my mum) made masses of flowers for the decorations at my wedding. Learn how at my workshop! http://www.thehandmadefair.com/skill-workshop/yarn-textiles/

Hope I see you there, Debs x

Thursday, 9 April 2015

A&A Cami 2: Widen Armholes

Good evening kind folk!

First off, thank you so very much for all your kind words of congratulation in comments and on Twitter. We are overwhelmed by your generosity! Me and Mr T have been doing our usual dealing with the little stuff, and the big stuff is taking care of itself. Thank you for your luck with the scan, everything looked grand, working organs and everything, I'm not sure how interested you are in our baby's organs... but now you know :-)

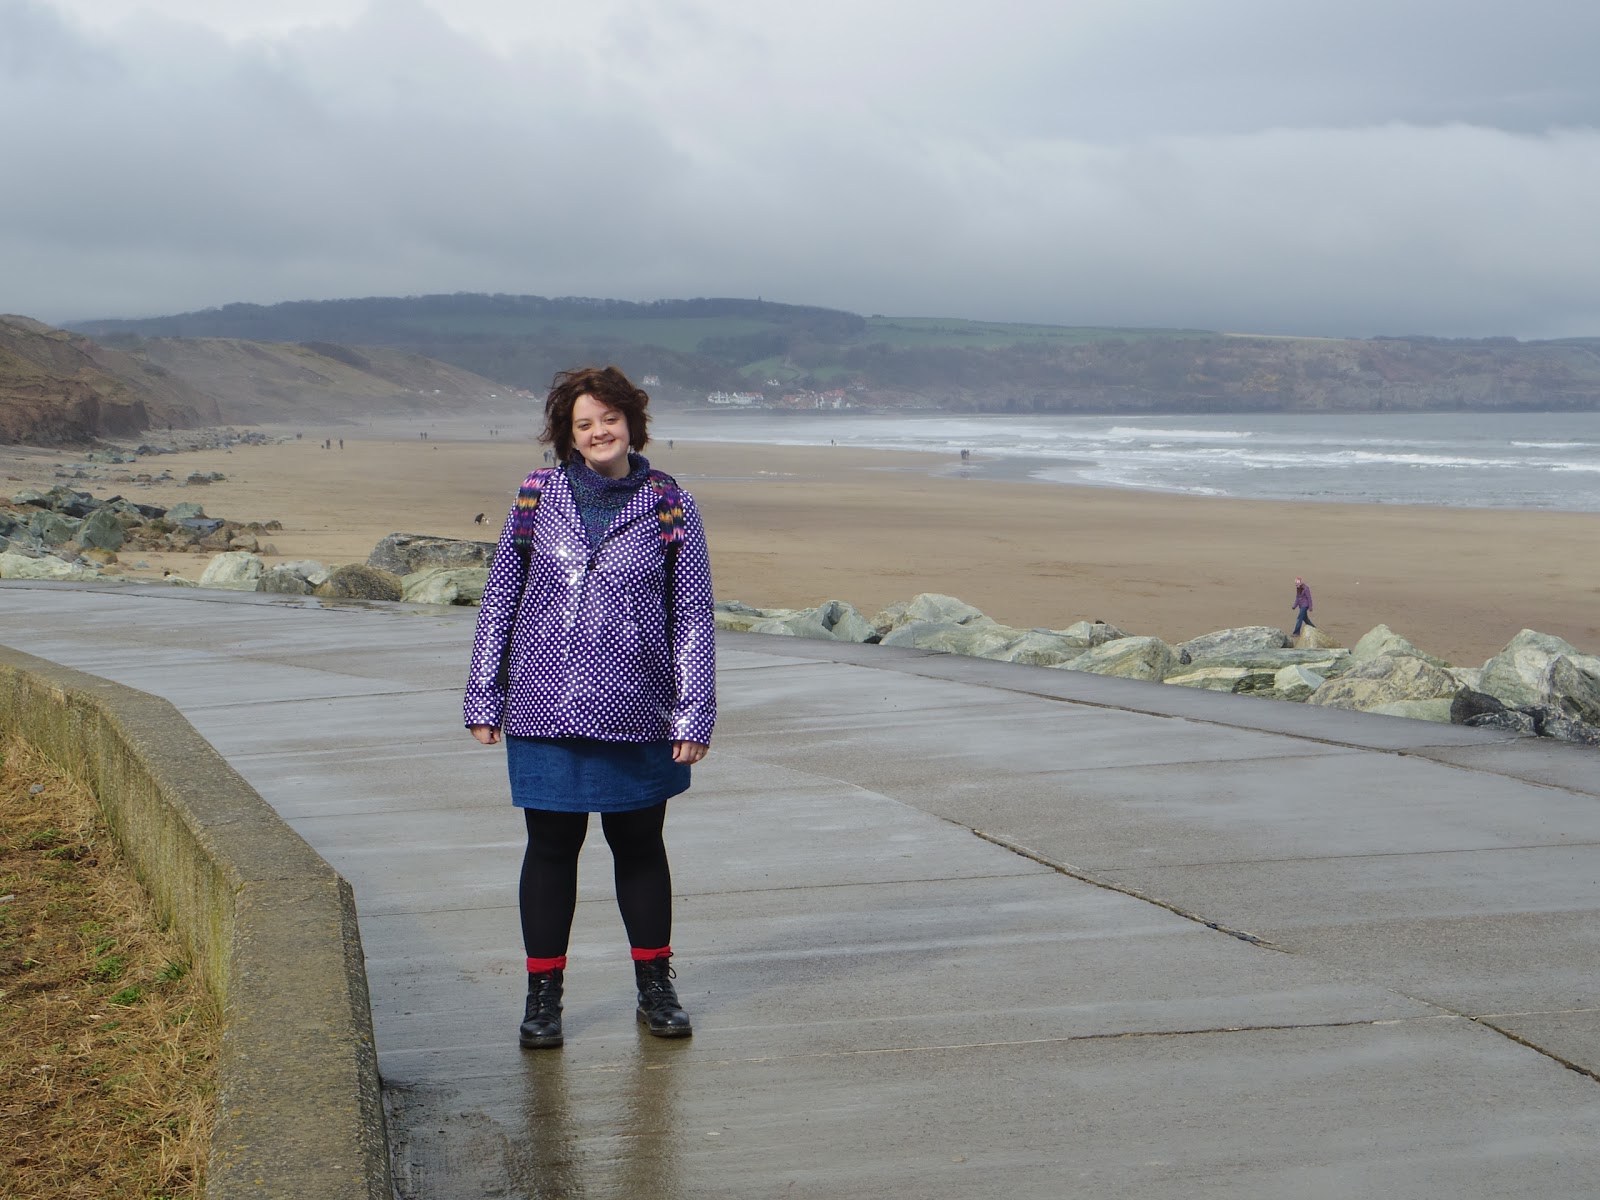
The weather has been amazing! We went to Whitby for the weekend, and I brought my thickest Mum knit jumper along as obviously I knew I would freeze. However, I got a sun burn! I know, nothing to brag about, but the first time you are caught out by the sun in the year is always worth a little celebration in my book. Here's me delighted just to be on holiday, however cold. I'm wearing my purple rain mac that I made last year, it's finally warm enough to wear it yay!! It really needs a zip though as half the buttons have popped off due to the inflexibility of the fabric. I'm trying to find a suitable double ended zip, but it's hard work getting one the right colour and size. Any tips?

Just imagine how big my smile was when it was sunny! I'm saving those pics for an outfit post, as I've finally got pictures of the map top I wore in episode one of the Sewing Bee. I've had quite a few requests regarding how this was made, so can't wait to show you the process.


So where were we? I've been taking you through some of the adjustments that I made to the Cami to make myself a standard shirt dress and shirt pattern. We have made adjustments to the shoulder seam, so it should now sit directly on the edge of my shoulder. You can read about this wide shoulder adjustment in my last Adaptation and Alteration post. I was hopeful that this would give me a little extra room in the bodice that would get rid of some of the pulling. However, I knew that the armholes were still tight, so I made an adjustment to widen the armhole. 

You can read a little bit more on this technique here:
1. If you previously cut a smaller size for the armholes, and you can still see the pattern marking for the larger sizes, then just cut along this line. If not, then mark the amount that you want to drop the armhole (I did this in 1cm increments) on the side seam. Using a french ruler copy the curve of the original seam line lower down, matching your mark up with the original curve as you can see in the diagram.

2.  Then you want to extend the side seams on the arm piece to match what you have just taken away from the armhole. I found the easiest thing to do was to re-trace the sleeve piece, then add the amount you need (should be the same as you have taken from the armhole in step 1) horizontally from the end point of the curve on either side of the sleeve. Taper this down to nothing at the end of the sleeve piece. 

So! As the original dress fitted so well, and I had now added so much room to the pattern at this point, I paused. I didn't want to go completely the wrong way and add in too much ease which would then result in a massive unwearable garment. So this is when I decided to make wearable muslin No. 2. 

I don't like the term wearable muslin... it makes it sound like it's a practise run, which I guess it is but doesn't do justice to the amount of work that goes into something like this. I wanted to do something a little different this time, as I didn't want to jump straight into another shirt dress. Therefore this time I opted for a shirt

In order to make a shirt pattern from the bodice, you extend the lines of the bodice out into the length for a shirt. I usually copy a shirt I already have:

1.  I first laid down my pattern piece on the table, I then covered this with see through medical paper which I use for tracing patterns. you can use any paper which is durable enough to withstand being pinned etc but is still see through enough to see the pattern pieces beneath. 

I then laid a shirt that I already owned over the pattern piece that I had made all of the adjustments to so far, matching up the end of the armhole and shoulder seam. I then traced the new hem line and hip angle up to the shirt side seam. I took away the shirt, and traced the rest of the shirt pattern that I had previously made adjustments to. 

You will want to ignore the bottom dart, but add in the bust dart to provide some shaping to your shirt.

2.  Using a ruler, follow the placket lines down from the pattern piece to the new hemline. Also you want to smooth out the harsh edge where the bodice and the hip line meet. You can do this by eye, or with a french curve. 

Hopefully you will now have a fully altered pattern piece to make a shirt with! Phew! With this pattern I made the Fantastically Generous Bloggers Shirt that you can see here! 


There is a lot more room for manouvre in this, but it still has its issues. The least of these issues being that it has now gone in the cupboard as I can't fit Bump into it anymore. But let's not dwell, there's plenty of time to deal with any further changes to be made in the next installment! I hope you're finding these posts useful, I always enjoy reading more in depth about the fitting process that someone goes through, as it reminds me that we don't all fit straight out of the envelope, and that there are fixes out there for these issues. 

I've got a weekend to myself this week, and I can't wait to sink my teeth into a more in depth sew. However, I really should make some more stretchy work skirts. Lets see whether head or heart win ey? You can follow me on instagram to get more up to date posts on what I'm doing right now @dfabricater.

Thursday, 2 April 2015

Easter week - Christmas Dress

Good day my dear friends! How are we all on this miserable freezing Easter Thursday? It's not just me right? It's chillyyyy! I was so excited to get out my Spring mac, as I mentioned in that blog post, it was a very seasonally inappropriate make once it was finished so I was counting the days 'til Spring. However, it's still a bit chilly for it really, so I've had to layer up rather dramatically but I don't care. It's Spring dammit and I'll freeze if I want to! Those females are strong as hell!


So anyway, to match this chilly chilly weather I'm showing you my Christmas dress... yeah it's a little bit late I know, ha ha. What can I say? time got away from me. I made it for the Autumn of 1,000 shirt dresses, and I definitely made it within the time frame, so I'm counting it as a win... don't judge me?

You may remember all of the alterations from my last post about the cami dress. Here you can see how all of those changes translated into the next dress that I made.


The skirt is one very large rectangle with lots and lots and lots of pleating. I love a pleat, I really enjoyed the pleating process on The Great British Sewing Bee kilt I made. It's a very relaxing process, (however stressful the Bee may have been) to sit and pin, especially with such a lovely pattern as a tartan which gives you a good bold stripe to match to. 


It made for a very swishy skirt as you can see me demonstrate here. I'm giving the camera total side eye here, you may be able to spot my fancy new remote control gizmo. This is why I'm giving the camera the eye, as I've not quite gotten to the stage where I know that photos are actually being taken ha ha. I made myself so dizzy taking these!


Here you can see a close-up of the pleats, and the pattern matching across the main seam in the middle (can you tell I'm proud?).


You may see that there is a little bit of a belly bump in the following pic....    Any guesses?
I'll give you a hint... I haven't been eating too much ice cream. Well, I probably have but that's not the reason!


Me and Mr T are having a baby!! His/ her name is Spud and we are now twenty weeks in. The big scan is tomorrow but we want to keep the sex a surprise, it's all very exciting, and has taken a while to sink in. This is really happening people! It is not a drill!

These cami dresses are holding up well to the bulging waistline, but not for long probably. Hence all of the washis in my life recently! I did find it very satisfying to go through my wardrobe and put away all of the things that wouldn't fit me. It was a great excuse to put away all of those things that you keep 'for occasions' but never wear. It really made some room, though it did show I've probably got way too many clothes. I'm sure I'll quickly get to the stage where I don't have enough though, so I'm enjoying it while I can.

Hubbie and I are off on holiday for Easter, very excited!

Friday, 27 March 2015

Alteration & Adaptation Cami 1: Wide shoulder adjustment

Aloha! Happy Friday everyone!

Well, I'm back to clothing and sewing and stuff. The past week has consisted of plans for the future, mixed with catching up on any of the things I may have lost track of during the madness of the last six weeks. Paul and I have been on the radio which was brilliant, though the 6am Saturday start two weeks in a row wasn't massively ideal. There are also some exciting plans in the pipeline, which I've been trying to keep track of and make sure I don't drop anything, there are so many things I want to do, I don't want to forget something!

No more episodes to review unfortunately, but I've been doing lots of sewing in the meantime, and am planning to do some more in depth posts on my process for sewing. I often find a pattern that has an element that I'm interested in, make adjustments to the fit so that it is spot on and then use that base pattern to make lots of different variations.

I want to show you how to do this from beginning to end. There will be gaps for light outfit posts in between as I don't know about you but sometimes I skip the heavy stuff thinking I'll go back to it when I need it so please feel free to do the same if you don't need this right now. But I thought I'd put my two pennies worth in to the pot on adjustment and adapting.

The first of which I'm doing today. Past readers of the blog may remember my first iteration of the Pauline Alice Cami dress, the Zig Zag Cami. The dress, although fantastically bright and much worn, does have some issues.


The armholes are a little tight, with the shoulder seams too narrow, not hitting the edge of my shoulder. The arms were also a little tight, you can see the wrinkles caused by this tightness across the arms in the picture above. Also, look how awesome the garden was in the Summer! I can't wait to get back into the garden properly again.

So it was time to do some adjustments! I decided to make a shirt, to test these changes, and to fill a hole in the wardrobe. I began by making a wide shoulder adjustment on to the bodice pieces, to ensure that the shoulder seam of the bodice would hit exactly on the edge of my shoulder. You can read fully about the process here. You can see a visual representation of the process below:

1.  To begin, start by drawing the seam allowances on to the bodice pieces

2.  Then draw on one line from the centre of the shoulder line down to the arm hole, stopping at the seam allowance. Follow this by marking a line from the corner of the armhole down to your new line

3.  Cut along both lines, making sure that you don't cut entirely through, so that the pieces can pivot as you can see above. In order to make the longer line pivot, snip horizontally in the seam allowance to the end point, again ensuring that you don't cut all the way through.

4.  Pivot these pieces to reflect the amount that you would like to widen the shoulder by, making sure that the lines match up along the top, and then re-trace.

I'll pause here, as I don't want to swamp you with too much information for a Friday, I mean it's quite obviously Pub o'clock.... what do you mean you're not going to the pub? Bath and knitting is it? Well, each to their own!

This weekend I will be stitching some more Spring clothes, I'm on a complete Washi kick, so that will be the pattern that I tackle next with regards adaptation. Also, if there are any techniques you would like to learn more about please feel free to leave a comment and I'll try to cover it in one of these posts.

Happy Friday!


Bit of a disclaimer: I will be writing about the adjustments I have made to garments as these are the ones I am currently most familiar with. Therefore, unfortunately I have not been able to cover the corresponding narrow shoulder adjustment for those people where the shoulder seam falls off the edge of the shoulder. However, there are so many resources out there, and I will always try and point you in the right direction where possible. 

Thursday, 11 December 2014

The Fantastically Generous Bloggers Shirt

I had a week off from le blog last week, sacrilege I know! But as you may know from my previous post, I started a new job and as we are on the countdown to Christmas there is just so much to do! I've been bringing a few things together, including some ideas for my secret santas. I decided to take part in two this year. One by A Krafty Kat, the one that I took part in last year, and have grand plans for my pressie. Also I have taken part in a newer crafty secret santa by Stitched Up from the Start I've got a great person and can't wait to get it all wrapped up and sent away.

How has your week been? Mine has been good, the new job wiped me out for the first week, lots of meeting new people (even though I've only moved down the hallway) and wrapping my head round a whole world of new acronyms. But I'm feeling good about the move, and can't wait to go to my (two!) Christmas parties.

When I got this new job, I started to think about getting some more work appropriate clothing. I would say that work clothes are one of the things that I love most about making my own clothes, I think I might have mentioned that in my Washi post. I want something that shows my personality, can be dressed up or down, and is layerable (because I sit on an air vent... not as exciting as it sounds). The photos in this are terrible, you can probably tell that yourself but I thought I'd mention it, sometimes it's either terrible pics or freezing pics while your neighbours watch you whilst clearing a garden. I went with bad pics.


Enter my Pauline Alice Cami Shirt

I got the buttons, and lovely... especially bad photographed bias binding from my secret santa last year, I snuck in under the line for making this before the next Christmas! This lovely packet came with instructions, I was to make a shirt. I hope I did you proud Santa!


Unfortunately I didn't find a place for the light blue ribbon, but it awaits in the stash for the perfect project. 

The detailing comes from another lovely bloggers de-stashing from the 2013 Birmingham blogger meet-up, unfortunately I didn't make this years... I was hungover (to my eternal shame). But hopefully it will be on again next year and I can tag along because it was a brilliant day. I got the following material from Amy of Almond Rock, in the great de-stash/ swap, and added it to cuffs and collar.


The shirt is a little tight in the back (see slightly unflattering picture below), I did widen the sleeves as per the adjustments I thought of from the Zig Zag Cami, including a wide shoulder adjustment, which did work as the shoulder seam now sits comfortably on the edge of my shoulder. However, I don't think I widened the arms enough and that is what is causing the tightness. On to the next version!


I bought the skirt in this post from a charity shop in Edinburgh when we lived up there, it had weird little tacked on badges of squirrels and owls, which I removed. It's a great skirt for walking up a hill, or going to the office, and is super warm for chilly knees. The lining was recently falling apart so I attached a new lining to the inside of the skirt, using the edge of the old lining to stitch to.


I love a colourful lining, this was another purchase from the blogger meet-up... there have been a few things languishing in the cupboard for a while ey? Feels good to be using up the stash.

Overall I'm very happy with this shirt, this pattern is on its way to perfect, and once it's right I have so many plans for pattern hacking. I'm very excited!... but should get back to making Christmas pressies. Selfish sewer? Who... me? Hope you have a great weekend.

Debs


Sunday, 13 July 2014

Zig Zag Cami Dress


Next stop on the list of challenges, a shirt dress! I love wearing shirt dresses, I wear them all the time and so I thought I'd give a collar a go. Plus I promised Mr T a shirt (i must be mad) so I thought I could make myself a collar on a dress without anyone scrutinising, bit of a practise.


I used the Pauline Alice Cami shirt dress. I found the pattern pretty easy to use, but I think the fit needs a little bit of work. Look at the pattern matching across the front.. what? Feeling like a winner. Also I dyed my hair again, bit of a last minute decision, went to boots and figured I needed a change. I did the double dye by tying the bottom of the hair in pig tails and dyed up to where the pony tail started. It's not the most even dye but I like it.

So yeah, the fit. I think it may be time for a full bust adjustment... dun dun duuuh. This dress stretches across the front, and there's some gaping at the side of the bust. So yeah, next time I'll give an FBA a go.

Other issues are around the shoulder/ arm area. There is a little bit of bunching at the top of the shoulder. This is only my second time setting in a sleeve though so I think I just need a little practise. However, the shoulder line should be on the edge of the shoulder and is actually a little high, so I think the pattern needs extending out a cm or so.. plus even though I measured my arm against the pattern piece it is a little tight on the arm.

So a few changes to be made to the pattern but otherwise pretty happy.


Here's the back! I put loads of pleats into the top, I like the look of these smaller pleats, and I used the whole width of the fabric for as much extra skirt as possible. Plus pockets of course, I like the inseam pockets on the pattern, they are just the right size, and have used them again in my most recent make.


The collar went really well (even if I do say so myself), though I found the instructions on the pattern a bit difficult to follow as a first timer. I went to the website and looked at the sewalong for some guidance but again... didn't really get it. I therefore looked at the archer sewalong for a bit of help (figured two -alongs are better than one) and it was so much easier to follow. I'd definitely recommend it. 

So I love this dress! I love the fabric, and the brightness and the fact that if you get too close to it you get a headache ha ha. If you're making your own clothes, whats to stop you making something you really love, especially if it's super bright. Therefore I submit this as my Oonapalooza make for July. Read more about Oonapalooza and the wonderful woman who inspired it here.


And in her honour, here's a gif of me dancing around... with much more of an attempt at modelly face, in honour of Oona.

Dancing photo d_dancing_zpsf88411f8.gif

LinkWithin

Related Posts Plugin for WordPress, Blogger...