Good day to you guys and gals! Hope you're all doing well, the past couple of weeks have been a bit crazy with last minute flights, trips to Birmingham and London, and this weekend we're off to Scotland. Who says pregnant ladies need to relax?!
To be fair I have done myself a bit of damage trying to do too much so am working from home today. I can't tell you how amazing the flexibility of my new job has been, I'm not sure I would have survived this long without it. Though sitting on the comfy seat does seem to make baby want to press his head against my rib.
Did you take part in Me Made May? It's all over now... and has been for a while ha ha! I had a fantastic time this year, and actually made it all the way to the end, which is the best I've ever done out of three years of taking part. You can see my pictures on my
instagram account. What normally happens is I'm really enthusiastic at the start and then slowly lose enthusiasm for it all and go silent. But this year I managed to stick to the documentation as well as (generally) wearing a me made item a day. That was my only goal, to stick with it so I'm really happy I managed it. Next year I'll try and take a pic a day, but this year I'm just proud to have finished it. No sweeping statements about what I have learned about my wardrobe for as you can imagine the only thing I learned is that my belly is getting bigger and there's not much I can do about that!
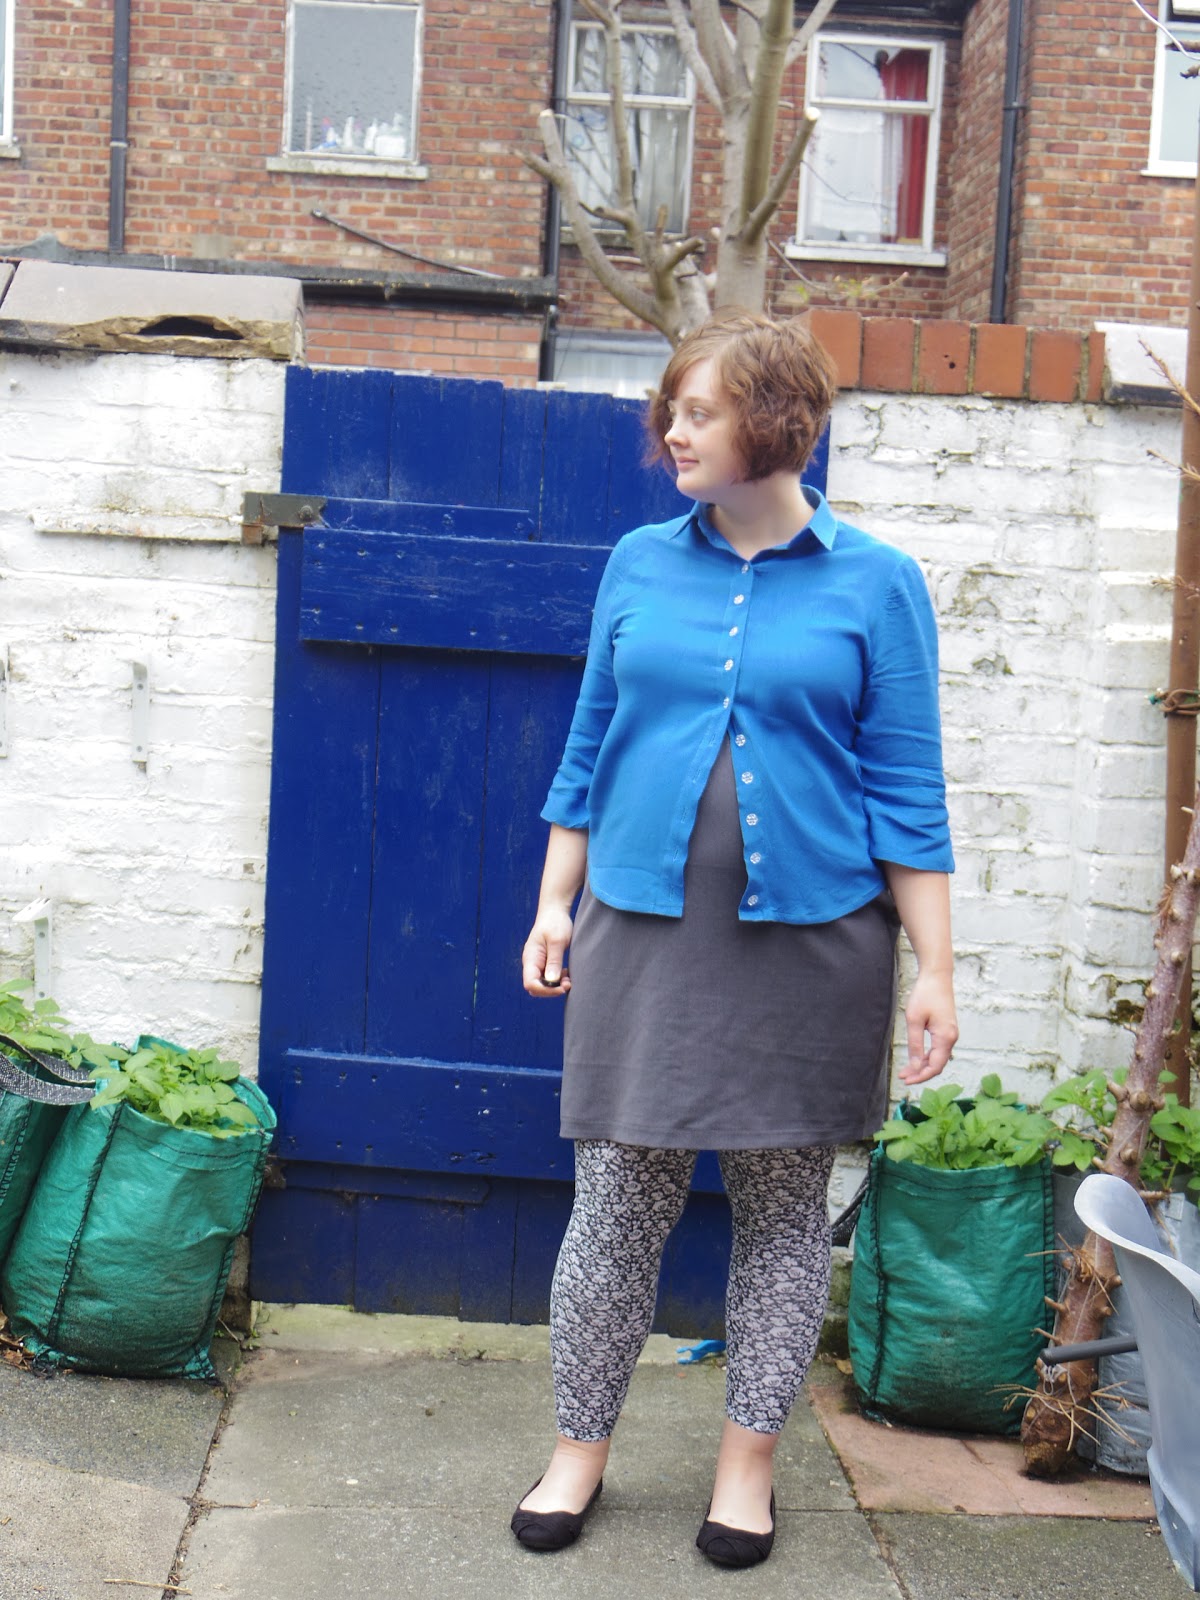
So this dress is another Washi make over ha ha. Once I find something that works, it's very difficult to sway from the path, I jsut make hundreds of the same type of thing until I don't want to make it ever again! In this case it's a good thing though especially as it's important these clothes take me through to the end of my pregnancy. This is a hybrid of the skirt from the
Washi by Made by Rae and the bodice of the
Cami by Pauline Alice.
I used my fully adjusted Cami bodice that you can read about
here. I've still got another post to do for that series, but I've covered all the fitting adjustments now, now I just want to show you all the different versions I've made!
Instead of having the bodice its full length, I scooped the bottom of the bodice pattern to the length of the Washi bodice, following the shaped curve. This means that the bodice is now the right height to accommodate bump.
I then used the back piece of the washi pattern, laying over the cami pattern to create the correct neckline and armholes. To ensure a comfy fit I left off the shirring elastic and replaced with fabric ties. It makes for a bit of a creasy ripply back, but it's so comfy and not everything has to fit to within an inch of its life ey? Ha ha. Oops, just spotted a loose thread on the bottom of this skirt. I don't think I've ever made anything where all threads are well trimmed.
Argh! Giant face! I wanted to include this to show off my collar. Every time I make this, the collar gets a little bit better, I'm still not the neatest sewer, but i'm getting better! Also, just look at that pattern match across the seam! So proud.
I think I managed ti avoid the points on this design falling exactly over my nipples, they are pretty close, but they did have to go somewhere, so I'm not worrying about it too much.
I don't often make clothes that fit well into the bracket of a certain decade, but this is definitely sixties, the design of the fabric, the fit of the skirt and the style all come together to make one heck of a sixties day dress. I feel pulled together and yet comfy, so important with Spud getting bigger. I think I'd like a fleet of these for post-baby clothes so I don't feel slobby when I'm comfy. Not that I can slip into the jeans and top routine as I don't own any jeans ha ha.
Again, these photos are from quite a while ago, so you'll have to take my word on the size of the bump, but it's getting pretty big!
What am I up to?
Have any of you got your tickets for the handmade fair yet? I'm going to be doing a workshop! So excited, some of you may remember that I (and my mum) made masses of flowers for the decorations at my wedding. Learn how at my workshop! http://www.thehandmadefair.com/skill-workshop/yarn-textiles/
Hope I see you there, Debs x


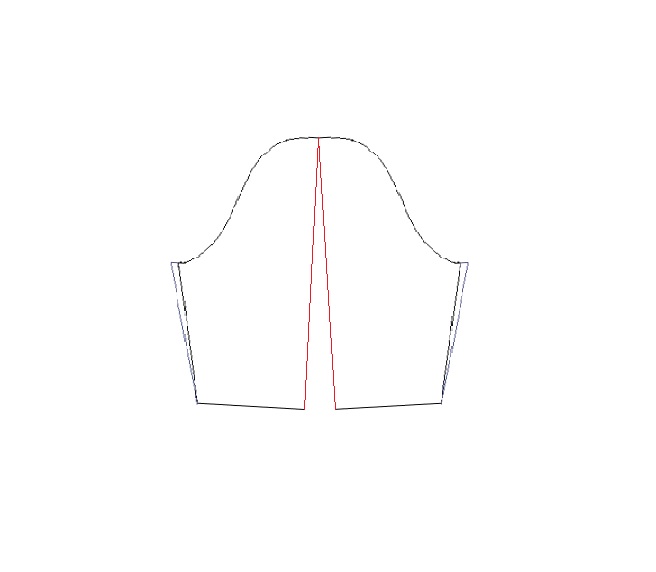


 1. To begin, start by drawing the seam allowances on to the bodice pieces


