Showing posts with label Vintage. Show all posts

Monday, 16 May 2016

Orange Wool Pinafore

Well! Five months is quite a while isn't it? I cite sleep deprivation and general exhaustion as the reasons. Evelyn had a few bad months of not sleeping as well recently so being Mum has taken all of my creative energy. I still managed a few bits and bobs of sewing here and there, and I've got a whole new batch of pics to show you so I should manage a few blogs in the next few weeks. I'm really looking forward to writing a bit again!


How honest should you be about a baby? I think the phrase 'not sleeping well' is a bit of a misnomer, when someone says they're not sleeping well I think the assumption is that it was a bit of a restless sleep right? Why would a baby having restless sleep affect your life? E's version of not sleeping well was waking three or four times a night, taking about 40 mins to go back to sleep each time. so you get your own sleep in two to three hour bursts probably adding up to about five or six hours. It's enough to feel like you can operate the shower, throw clothes on in the morning. But anything beyond that has been beyond me, so less seeing and going out etc. But she's done really well this week so I feel much better, fingers crossed it lasts a little longer!


I based this pinafore pattern on Style 1156, and made the first version last year from stretch denim. I was pregnant when I wore the pinny, but as it was made from stretch I've been able to wear it since the birth. The empire line, plus the easy access for breastfeeding has made it a workhorse. Though I have felt like I've worn denim way more than I ever have before which is quite plain for me, so I've been trying to build up my collection of tops to go with these denim things. 

My new life of sitting on the ground, and baby carrying/ pram pushing has been a big change in my wardrobe, which was all geared towards that five line if work and home appropriate. A lot of my clothes were dresses and what with the breastfeeding I haven't been able to wear them so I've been trying to find myself stylistically since. I'm now going back to work in a few weeks so now that I now feel like I'm getting a handle on my style, it will all change again! I'm looking forward to wearing non boob access clothing though!


It really needs a hook and eye at the top, this pinafore took over a month as I was making it in small increments. By the time I got to the zip, I just was done with making this ha ha. I also bought the fabric just as E was born, so it had been sat a while before I started making it. I love it, but I kind of missed the boat to wear it weather wise, it's nice to have a reason to look forward to winter though, especially as summer is only just beginning.


It has a full lining, cotton on the top, and anti-static for the skirt. I knew that I would be wearing this mostly in the winter so I needed to add this extra element to make it wearable. Unfortunately I under-stitched the outer fabric rather than the lining, so the lining pokes out. This is one of those things that you forget if you aren't sewing as often, the little things that are second nature have to be remembered and sometimes you forget something, no big deal. 


I feel like this is a good 'transition' piece of clothing, as in I'm hoping if I wear a smart shirt underneath I can wear it to work and feel smart. It's pretty seventies which was all the rage last winter, no idea if it will still be the case this year but, what do I care? Ha ha.

I've been participating in Me Made May this year and I've actually remembered to join in every day so far! Can you imagine?! I've found it really interesting in that I tend to have a few favourite items of clothing that I just wear over and over. It's like a mini capsule wardrobe, I'll fall out of love with one thing, replace it with another, and then keep those few items on rotation. I've got masses of clothes so it's interesting to see how little of them I wear on a day to day basis. I've also recently changed shape and am so now wearing jeans! I'll blog a bit more about this with a pic but it has been great to bring out some old me mades to rotate into the mini wardrobe. I'll articulate this better next time.

Also, sewing bee tonight!! So excited, all the fun, none of the jeopardy! 

Friday, 18 July 2014

Refashion Skirt

Certain ones of these posts are from quite a while back, I have such a backlog of projects that I can't quite remember the ins and outs of the pieces I'm talking about :-S But the sun is shining these days so I'm getting pictures taken, which was my main issue before.

It's not like the darkness in the photos really puts me off, I'm definitely not the worlds best photographer so a little bit of light is probably not going to make a huge difference to what my skills can manage. It's just that when it's light I feel like I can achieve things, I can be bothered to get changed, and sweep the garden, and maybe even change shoes. I never can be bothered to put on make-up, but I never really wear make-up so that would be kind of weird. Though I did for my last make and enjoyed it, I guess it depends on the day.

So anyway, here is my next project! This was a refashion project, I bought the skirt in a shop in Stockbridge. It was full length and I typically didn't take a picture of it before I started. But here's a pic of the finished project!


Just to confuse you, I took these before I changed my hair. The waistband was a little small, but it used elastic so I knew I could make it bigger. I unpicked the waistband, evened it out into a rectangle rather than a triangle... not my sort of thing. I added a full lining of white muslin to give the skirt body as it is a very soft drapey fabric (not sure what it is but it's lovely).


I kept the original pleats in the skirt, and shortened the length considerably. It is now a perfect sunny day skirt for work with a shirt (like in this pic) or at the weekend with sandals. It turned out once I made all this that the waistband was a bit too big, son of a gun!! So I just stitched the back together pinching out 2cm either side at the back waistband. At some point ill replace the elastic and then it will probably fit fine. 

That's it! Signing out


Monday, 10 March 2014

Mad Men Dress Challenge... I'm in!

I'm taking part in a sewing challenge, and I'm actually on track for finishing! Can you believe it? I can't ha ha.


The Mad Men Challenge is something I have looked at over the past couple of years and have slathered over all the beautiful dresses that everyone makes. Set up a few years ago by Julia Bobbin the challenge has grown in popularity ever since.


With the end of Mad Men drawing near, I didn't want to miss out on making something inspired by these fabulous ladies.


Julia has posted a lot of amazing inspiration in the past, and some lovely round-ups of those taking part. I started here looking at what people had made, what options there were and then (as is usually the way) found myself on pinterest pinning to my hearts content. You can see my inspiration board here, as you can see I wanted something in the vein of a work dress, as this is where I feel I'm lacking the most in the wardrobe (as discussed in my previous post).

I finally settled on this collared beauty from Modcloth:


My dress therefore won't be a direct Mad Men copy, but Mad Men inspired, as, well, this was my favourite so what ya gonna do?

My version is based on the By Hand London Anna dress, as I felt the lines were very similar. This will be my first make by these amazing independent pattern makers. I am at the moment doing some finishing touches, and will hopefully have some pics to show you by the weekend. 

In the meantime, hope you're enjoying this amazing weather! 

Tuesday, 3 December 2013

Underneath the dress

Ha ha think I said proud in that last post about a hundred times. You get the idea right?

So where were we? Right! I had adjusted my muslin, I tried it on and all was well. I forgot to mention that I didn't require boning for the dress due to a corset that I had specially made here.


A picture of me in it would definitely be a bit risque for the blog but here are some phone pics of it all finished. It is an over-bust corset with gores. More of a vintage shape which went well with the shape of the dress. We did have to adjust it at the night do to give me room to eat and breathe, but once adjusted I was good to go!

The lady was amazing, and when I told her I was making my wedding dress she gave me some great advice (specifically about the lace, wisdom I will pass on when I get to that point). I got to choose every element of the corset myself, colour, lace inserts, material. It was a great experience and one I would thoroughly recommend, especially as it saved me so much work on the dress.

Next up, the construction of the under-dress and the lace layer. One month since the wedding yesterday, I can't believe how the time has flown. I bought this corset in January! Ridiculous

Wednesday, 26 September 2012

Not a pillow... not a cushion... but definitely embroidered


This is quite a picture heavy post, which I suppose is better than a word heavy post, so I'll try and keep the words to a minimum. You can see previous incarnations of this project here and here, and in this one I'm going to show you how I finished off the project once the embroidery was complete (another project finished, hoorah!).

To finish the embroidery I learnt a new stitch, fly stitch which I used to finish the lilac lavender/ reeds (?). I used these instructions, and it seemed very similar to detached chain.


The rest  of the embroidery was finished using a combination of detached chain, lazy daisy, french knots and backstitch. If you'd like a more in depth list of how to do this pattern, (and perhaps a scan of the pattern itself) please let me know and I will do a more developed post.

To finish the cushion, I started by trimming off all the edges with my new toy rotary cutter. I then pressed in the sides, giving 3/4" of border around the outside, pressing the bottom edge first, and matching the top layer to this.


To press in the corner, fold in the corner of the edge down to your pressed crease on the inside. Press the original crease again, with the triangle on the inside. Like this:


I then sewed in the pom pom edging I posted about here, between the two layers using my zipper foot:
Once I had a basic layer for decoration, I got out all the bits and pieces of trim from my stash that went well with the pompom trim/ embroidery. I laid these onto the cushion to give me a starting point.
I then attached all trims which would be treated as one. Such as:

 In order to make the plait as above, I stitched the three ribbons together with the machine, leaving the needle in. I then plaited from this point, stitching the other end together when complete.
 
 I then stitched the layers on in stages, one ribbon at a time, beginning with the layers on the bottom, and finishing with those on top (as you'd imagine). This was quite complicated, as I tried very hard to only stitch through one layer of fabric. This meant that I had to resort to hand stitching for some elements.

This is the finished project, what do you think? Should have taken the pics in daylight really, apparentl 7.30am doesn't constitute daylight anymore.


Deborah


Saturday, 15 September 2012

September Weekend Projects

Working for the Council has some benefits, the best of which is the Midlothian September weekend. I have a four day weekend to play with, and for the first time (probably since we moved up) we don't have visitors!


The original plan was to make a practise version of my wedding dress (above left), but with the prices of fabric up in Edinburgh, and the amount of fabric needed for my first draft pattern V1094, I decided to get a pattern with a little less fabric. So I chose New Look 6723, and a beautiful vintage wallpaper-esque navy blue fabric. I think I need the most practise on the bodice, so went for a basic one to start with, to work my way up. I'll keep you posted with progress on this one.

The project I've first started is a re-working of the orange skirt (in the centre of this picture), when I first bought this skirt it was a number of sizes too big for me. So I did my usual job of taking it apart and adding a couple of pleats. It sort of fit, but having lost a little weight over the summer, it has just become unwearable. So I've gone back to basics, taking all the seams apart, and making the pattern pieces from New Look 6128. I ran out of fabric to do the waistline, so I've added in some dark green and blue tartan as the pocket pieces, adding some contrast. I think it works, but will have to wait and see if I wear it when it's finished.


You've seen a variety of pictures of my flower embroidery, and I'm coming to the end of finishing it. So I bought some teal pom pom trim (my favourite kind of trim) and I'm going to add it to the edge of the pillow/ cushion to make it slightly more cushion looking (hopefully). Also, Im thinking it needs something a little more in the main area of the cushion, feels a litte white to me. I've got some plans for how to fill this in... watch this space!

Obviously I have taken on way more than I can do in this weekend, but it's quite nice to have exciting plans ahead. Ill update you soon with my progress!


Deborah

Monday, 3 September 2012

Embroidery bonanza

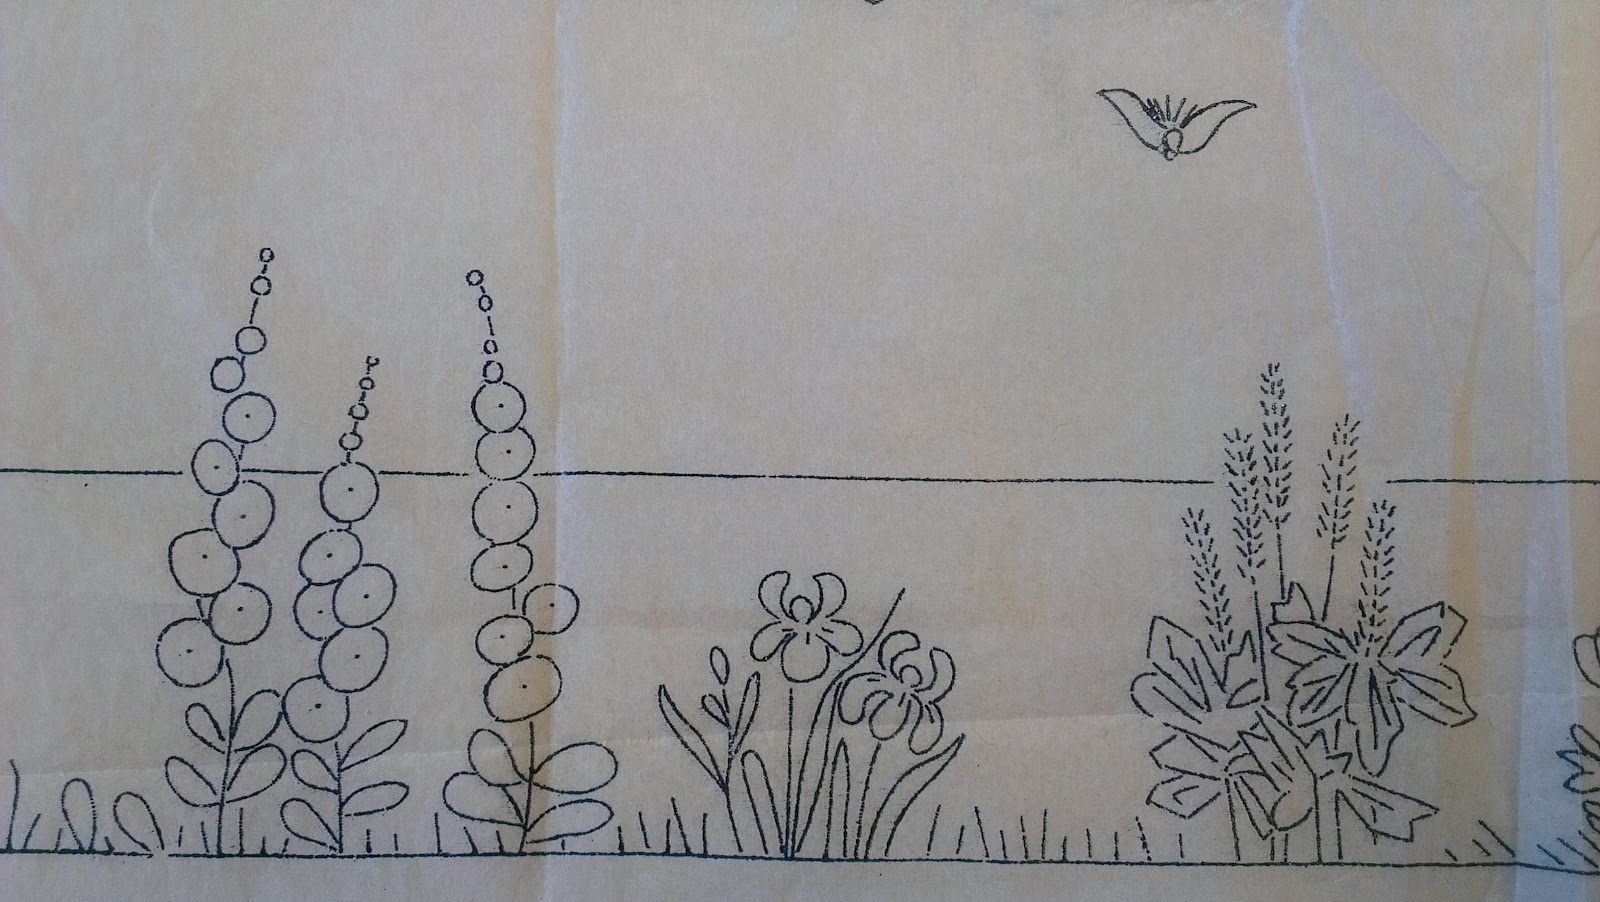
For my birthday this year, I received some beautiful vintage embroidery transfers from Mr T's mum. Having just started up properly with embroidery, I'm really exciting about practising some techniques, and finding some new ones to fill in the gaps in these lovely patterns. I've got four plain cotton pillow cases (I call them pillow cases but they're actually too big to be cushions and too small to be pillows) to decorate, and so I've chosen the following pattern:

 They are far too chintzy for Mr T's taste, but as usual I'm sure he'll suffer in silence. I'll try and include some dark red, and some navy, that should keep him happy.

So, in order to copy over the pattern, as I didnt want to damage the pattern anymore than necessary (some of the transfer is starting to peel away, leaving little black spots all over my desk.) I just laid the pattern under the top layer of cotton, and traced it over in my trusty wash away pen. And I ended up with this!

Those with good vision might spot the failure of a bird with a big cross through it on the right, I do want to add some birds/ bees around the flowers, but will try and find a better pattern elsewhere as the birds on this pattern look a little odd.

Having traced over the pattern very roughly I then filled in the detail freehand. I'm very happy with how it came out... but we'll just have to wait and see what kinds of stitches I might need. Let me know if you have any suggestions.

Deborah


LinkWithin

Related Posts Plugin for WordPress, Blogger...