Showing posts with label Finishing. Show all posts

Sunday, 2 March 2014

Stars in their eyes interview dress


One of my goals for this year is to develop a 'work wardrobe', staple dresses and skirt/ shirt combinations that I can throw on in the morning and feel smart. I want to able to show my unique style, whilst feeling like a boss (not for sensitive eyes).

This dress is the first step on that road! I love this dress, I feel smart and stylish, I can wear dramatic tights of all colours and shapes, and I got to stretch my embroidery skills on something other than home projects which was cool. I might try and do some more of this, maybe some flowers like the one from this cushion on the bottom edge of a similar dress? I feel the need for a bit of a spring make.

The dress is a combination of the pastille bodice, and New Look 6128 (shocker of a skirt choice). I made a christmas party dress last year (yet to blog about) and I love the neckline for a night out, but for work it's a bit on the low side. I altered the neckline of the bodice by lying out the pattern piece on some medical paper, drawing out my adjusted pastille bodice and free-handing a scooped look with my french curve.


I then cut out my lining in black linen-look cotton from Minerva, which I bought to make another New Look 6128 (never blogged... hmm sensing a theme), which I made last year for something light to wear in the summer months. I've got loads left and have been using it to muslin dress bodices, and then using this muslin as a lining for the actual bodice.

I am very proud of the finish of this dress, it is fully lined, with black bias edging on sleeves and the bottom of the skirt. It really picks out the black of the embroidery.

I went for a non-static generic lining for this project. I like the way it swishes when I walk, and I know my tights aren't going to get stuck on it. Probably should have ironed the lining for this pic but you get the idea.


In order to do the embroidery, I completed the bodice, attaching the lining to the neckline, and under-stitching. I then tacked on some silk organza to stabilise the fabric, and to give a white surface to draw on. I then free-hand drew on the design I was after with a water soluble pen, and stitched with black polyester thread the outline of the stars so that it would show through on the right side of the dress.


I then filled in these stars with a combination of backstitch, french knots and brick stitch.


In order to create the design, I pinned some images of stars on my pinterest board, to give me an idea of what I was looking for. Originally I was planning on creating a pdf which I could use as a template, but once I reached that point, I found it easier to draw the stars on by eye. It was easy once I knew what I was looking for. I thought about doing free-hand machine embroidery for the stars but after some practice realised I liked the control of the hand-stitching.

I even got to match my pockets to the star-theme, with some stitched together very last scraps of my planet fabric.


And now, for making it through all the techie bits... me and an umbrella!... and yes, I chopped off all my hair! :-D


Thursday, 23 May 2013

Sleeveless Mathilde


Here is my Mathilde Sleeveless Blouse as promised! I love this blouse, it's floaty, spring-like, work appropriate, and a stash bust, hoorah. The fabric was bought in my years at Abakhan and is a polyester-type chiffon-type material (not very accurate description I know). 

It's been a staple through Me Made May, as some of you may have noticed. Not sure why I'm pouting in so many of these pictures... maybe I was feeling especially posey. Apologies for looking so shattered in these, it's been a hard week! I'm shattered, but it's nearly the bank holiday weekend. Before I get into the ins and outs of this make, I wanted to let you know that me, my sis and best friend went to London last weekend and found the bridesmaid dresses... and they are amazing! Can't wait to show you, you lucky people you.


I put a lot of effort into this blouse, this is the first time I've ever worked with chiffon (?), and wanted to make sure it wasn't skew whiff. I took my time, and wasn't able to draw on the fabric with anything that would show up due to the pattern/ material so as you can see (just) in the above three pics, I traced all my markings with tacking stitches in orange. This was a very lengthy process, but totally worth it, as everything turned out straight, and my tucks are much better than with my black Mathilde.


I wanted to really highlight the best elements of this top (like the tucks and yoke) and didn't want them to get lost in the pattern, so I added some lace along the seam of the yoke, and was going to add some behind each tuck, but it just looked far too busy, so I settled on the top line and I'm really happy with it.

I also bought both ivory and pale grey bias binding to finish the seams, to see how both looked, and I settled on the ivory as it went so well with the lace. And I bought orange flower buttons to go along the back, but again it looked busy so I went for ivory buttons, but in all different shapes and sizes (relatively similar) this did take a while, as each button hole was different to the last. But it was a great stash buster, this has been good on the stash-busting all round. To complete, here are some pics of me looking silly and tired.


Wednesday, 24 October 2012

Fix up, look sharp


I have been spending my time before I begin the arduous packing process as an opportunity to do all those sewing jobs which aren't very exciting, but are very important. Like fixing old projects, and sewing clothes that are falling apart back together, so in the next couple of days expect some more pictures of me posing (slightly awkwardly) in lots of skirts!

The first is a skirt that I had made over a year ago (if not longer) it was based on a very similar theory to the Picnic Blanket Skirt, with the original having buttons down the front, and pleats instead of gathers. I stupidly didn't take a picture before I started so unfortunately you'll have to use your imagination.

This material (which I think has some silk in) is super soft, with a floral design which is much greener at the bottom. When I bought it, I was itching to make something with it so I forged ahead without interfacing the waistband or plackets. The skirt looked great for a wee while but eventually the waistband started to crumple and the buttonholes started to stretch (mostly because I did the buttonholes vertically rather than horizontally).

Therefore I decided to do it right this time, and change the skirt to a simple dirndle skirt, to show off the swishy-ness of this material. I used my new favourite (a lapped zipper) up the side, added some more pleats to adjust for the added material not needed for the plackets and added interfacing to the waistband. You can see in the picture the lapped zipper, which worked well apart from for some reason the waistband didn't match once it was sewn in. I have adjusted for this with the button, and think I need a little more work on my lapped zipper.

Have you got any hints and tips to make a lapped zipper easily without this problem? Let me know!

Also, do you put off these renovating jobs? All those finickety jobs that need doing but aren't very exciting? Post them below, and join me in fixing up your wardrobe.

Deborah


Thursday, 20 September 2012

September success


The September weekend was a success! I finished a whole skirt, very proud of myself for actually finishing a project. And I'm itching to share it with you, but unfortunately Mr T took the final pictures with his camera, so I’ll have to wait until he has a second to put them on the laptop.

In the meantime here’s a sneaky peek. This picture makes it look like I play guitar... in fact I'm far too lazy for all that learning... I took the guitar off Mr T so he could take the picture, obviously wasn't paying enough attention to put it down again.


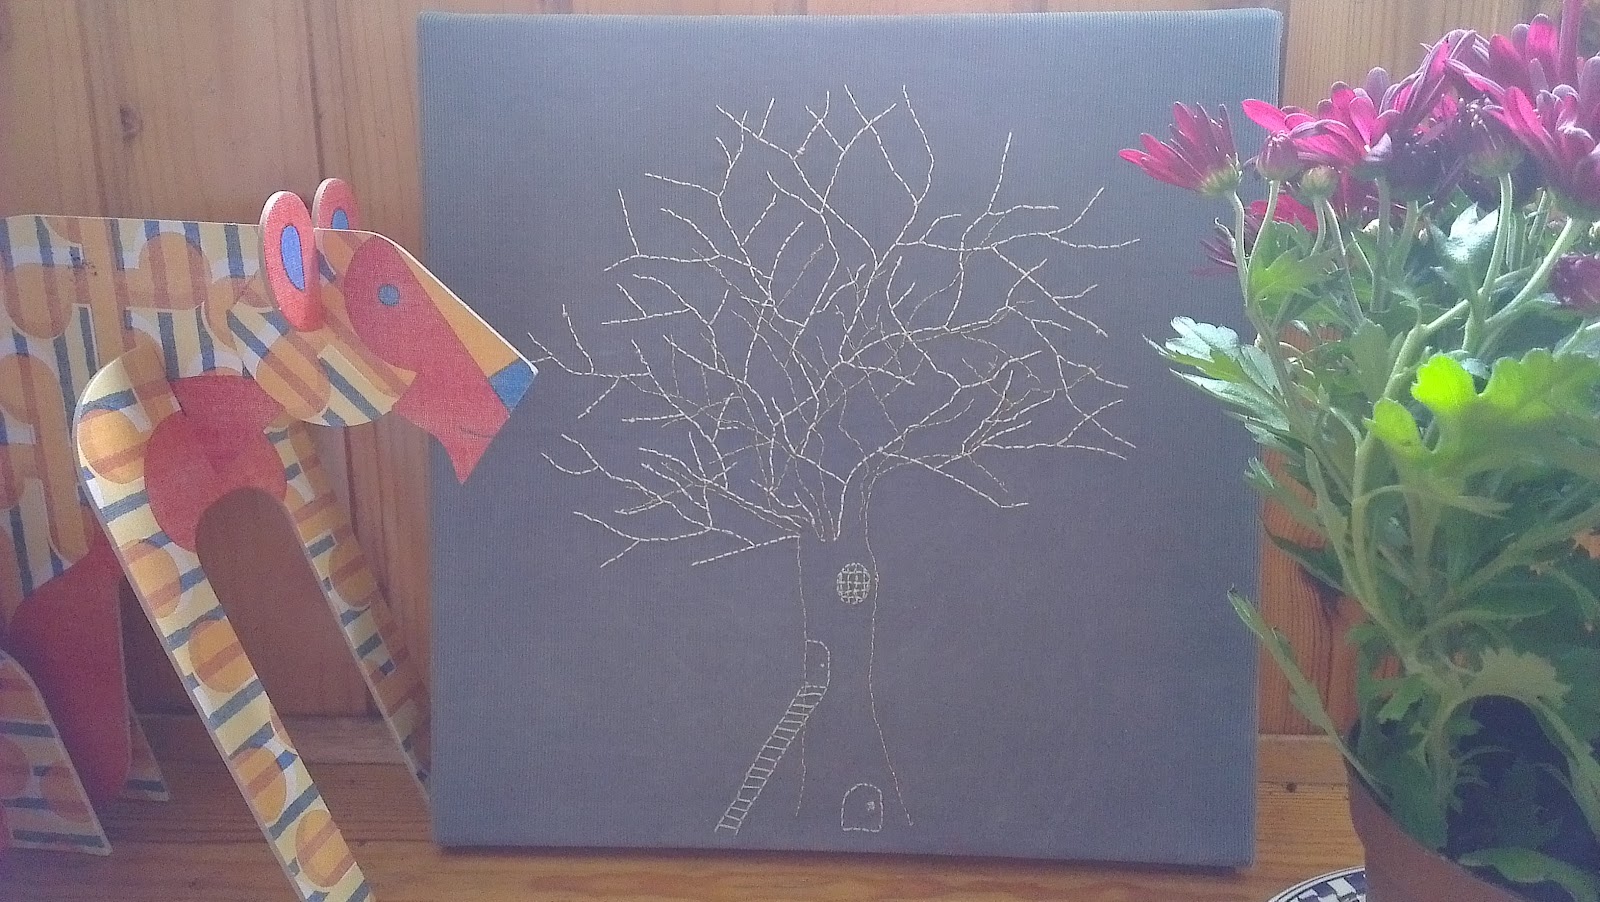
I also attached the embroidery below (which I finished ages ago) onto a canvas. The little art shop in Stockbridge is having a sale on canvas, and it occurred to me that this was the perfect forum for my embroideries. These usually hang around folded up in a ‘to be completed’ pile because I can never decide what to make them into when they’re done. But I’m really happy with how this came out, and think I’ll do it again with any new embroideries.  

It’s easy to do, I used metal drawing pins, pulling the fabric tight over the canvas and hammering it in at the centre of all four sides. I folded the excess fabric at the corners over, and hammered that in place. Then I added in pins wherever it looked like the fabric was loose. Ill try and take pictures the next time I do it. I was sorely tempted to buy a heavy duty stapler for the occasion (something I’ve wanted for ages) but resisted temptation (for once), sticking with the drawing pins I already had in the cupboard.

Saturday, 15 September 2012

September Weekend Projects

Working for the Council has some benefits, the best of which is the Midlothian September weekend. I have a four day weekend to play with, and for the first time (probably since we moved up) we don't have visitors!


The original plan was to make a practise version of my wedding dress (above left), but with the prices of fabric up in Edinburgh, and the amount of fabric needed for my first draft pattern V1094, I decided to get a pattern with a little less fabric. So I chose New Look 6723, and a beautiful vintage wallpaper-esque navy blue fabric. I think I need the most practise on the bodice, so went for a basic one to start with, to work my way up. I'll keep you posted with progress on this one.

The project I've first started is a re-working of the orange skirt (in the centre of this picture), when I first bought this skirt it was a number of sizes too big for me. So I did my usual job of taking it apart and adding a couple of pleats. It sort of fit, but having lost a little weight over the summer, it has just become unwearable. So I've gone back to basics, taking all the seams apart, and making the pattern pieces from New Look 6128. I ran out of fabric to do the waistline, so I've added in some dark green and blue tartan as the pocket pieces, adding some contrast. I think it works, but will have to wait and see if I wear it when it's finished.


You've seen a variety of pictures of my flower embroidery, and I'm coming to the end of finishing it. So I bought some teal pom pom trim (my favourite kind of trim) and I'm going to add it to the edge of the pillow/ cushion to make it slightly more cushion looking (hopefully). Also, Im thinking it needs something a little more in the main area of the cushion, feels a litte white to me. I've got some plans for how to fill this in... watch this space!

Obviously I have taken on way more than I can do in this weekend, but it's quite nice to have exciting plans ahead. Ill update you soon with my progress!


Deborah

Friday, 7 September 2012

Embroidery Workshop


I'm running an embroidery workshop on Monday 10th September for my co-organised craft group Granny Greens. It will be a beginners course, providing all the knowledge you need to be a whizz bang freehand embroiderer.

I'll be providing my knowledge, and the knowledge of wiser others for the teeny tiny fee of £1.50 for materials! For some great hints and tips before you get there, check out Wild Olive . There are some lovely illustrations in this series of posts, which are very simple, colourful and easy to follow.

I'm buzzing with ideas for the workshop, and would love to hear yours so get in touch! @DFabricate or leave a comment below.

For more details on the workshop, or what we do at Granny Greens click here.

Hope to see you there! Deborah


LinkWithin

Related Posts Plugin for WordPress, Blogger...