Aloha! Happy Friday everyone!
Well, I'm back to clothing and sewing and stuff. The past week has consisted of plans for the future, mixed with catching up on any of the things I may have lost track of during the madness of the last six weeks. Paul and I have been on the radio which was brilliant, though the 6am Saturday start two weeks in a row wasn't massively ideal. There are also some exciting plans in the pipeline, which I've been trying to keep track of and make sure I don't drop anything, there are so many things I want to do, I don't want to forget something!
No more episodes to review unfortunately, but I've been doing lots of sewing in the meantime, and am planning to do some more in depth posts on my process for sewing. I often find a pattern that has an element that I'm interested in, make adjustments to the fit so that it is spot on and then use that base pattern to make lots of different variations.
I want to show you how to do this from beginning to end. There will be gaps for light outfit posts in between as I don't know about you but sometimes I skip the heavy stuff thinking I'll go back to it when I need it so please feel free to do the same if you don't need this right now. But I thought I'd put my two pennies worth in to the pot on adjustment and adapting.
The first of which I'm doing today. Past readers of the blog may remember my first iteration of the
Pauline Alice Cami dress, the
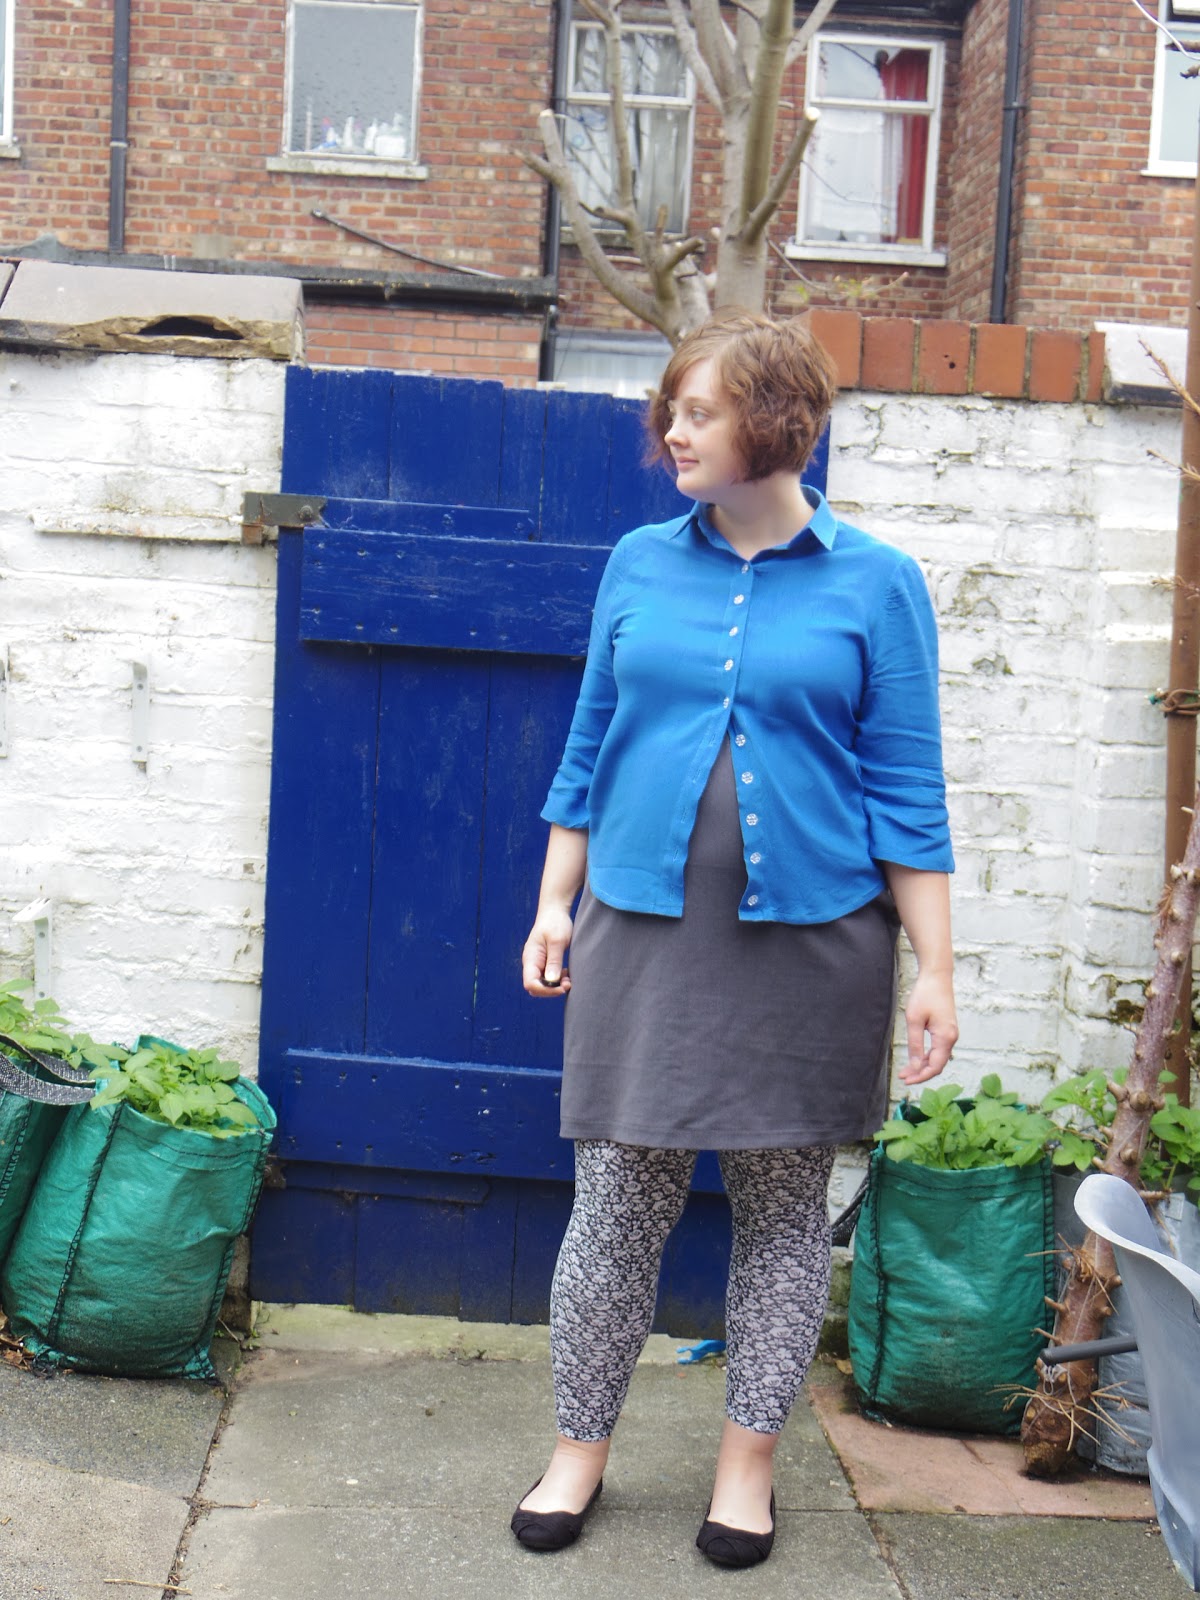
Zig Zag Cami. The dress, although fantastically bright and much worn, does have some issues.
The armholes are a little tight, with the shoulder seams too narrow, not hitting the edge of my shoulder. The arms were also a little tight, you can see the wrinkles caused by this tightness across the arms in the picture above. Also, look how awesome the garden was in the Summer! I can't wait to get back into the garden properly again.
So it was time to do some adjustments! I decided to make a shirt, to test these changes, and to fill a hole in the wardrobe. I began by making a wide shoulder adjustment on to the bodice pieces, to ensure that the shoulder seam of the bodice would hit exactly on the edge of my shoulder. You can read fully about the process
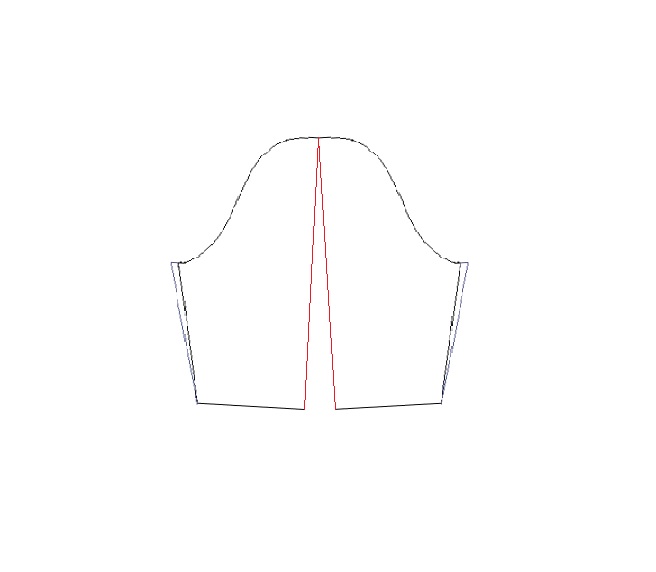
here. You can see a visual representation of the process below:

1.
To begin, start by drawing the seam allowances on to the bodice pieces
2. Then draw on one line from the centre of the shoulder line down to the arm hole, stopping at the seam allowance. Follow this by marking a line from the corner of the armhole down to your new line
3. Cut along both lines, making sure that you don't cut entirely through, so that the pieces can pivot as you can see above. In order to make the longer line pivot, snip horizontally in the seam allowance to the end point, again ensuring that you don't cut all the way through.
4. Pivot these pieces to reflect the amount that you would like to widen the shoulder by, making sure that the lines match up along the top, and then re-trace.
I'll pause here, as I don't want to swamp you with too much information for a Friday, I mean it's quite obviously Pub o'clock.... what do you mean you're not going to the pub? Bath and knitting is it? Well, each to their own!
This weekend I will be stitching some more Spring clothes, I'm on a complete Washi kick, so that will be the pattern that I tackle next with regards adaptation. Also, if there are any techniques you would like to learn more about please feel free to leave a comment and I'll try to cover it in one of these posts.
Happy Friday!
Bit of a disclaimer: I will be writing about the adjustments I have made to garments as these are the ones I am currently most familiar with. Therefore, unfortunately I have not been able to cover the corresponding narrow shoulder adjustment for those people where the shoulder seam falls off the edge of the shoulder. However, there are so many resources out there, and I will always try and point you in the right direction where possible.