Showing posts with label Shirt. Show all posts

Wednesday, 24 June 2015

A & A Cami 3: Shirt Pattern

Good day to you all good fellows. I am back once again from another trip away! What was that people say about resting during pregnancy? Ha ha. No, to be fair these trips have been very restful if not a little sore on the hips. I've worked from home again today so I can recover. 

So I'm back with the last of the adjustment and alteration posts for the Cami pattern. Last week you saw my Cami-Washi hybrid, and I will do a post to show you all of the different iterations of this pattern so far at some point. I hope it goes to show what can be done with one pattern and a few changes. 

Chronologically, after my last Cami shirt I made the Christmas dress that you can take a nosey at here. The one change that I made to the shirt at this stage was to widen the lower half of the armhole. You may remember that in the last installment of A&A I had extended the armhole, so this now fitted well. However, the width across the arm was still tight, especially in the non-stretch of the navy cotton I had used. Therefore I made the following adjustment to the sleeve pattern, 

I began by drawing a straight line down the centre of the sleeve pattern:
I then cut through the sleeve pattern piece, leaving a very small amount of the pattern at the top of the sleeve. This was then used as a pivot point, splitting the sleeve by the amount that I wanted. I ensured that the gap was equal on both sides by measuring the amount from the tip to the base of the split. 
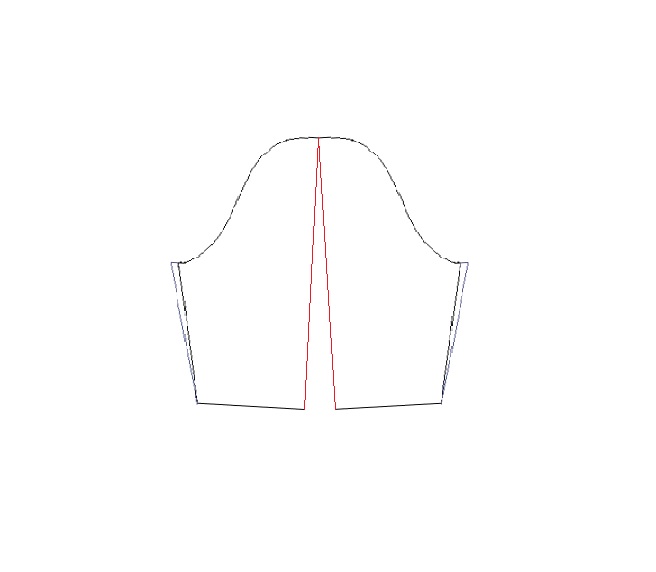
I then re-drew the armsleeve, including in these changes, and removing the angle which was caused at the bottom of the sleeve by the pivoting.

This was a speedy fix and probably caused a bit too much at the bottom of the sleeve, especially on the 3/4 sleeve. This may need a little work if I make another longer sleeved version, but it is perfect for the shorter sleeve. 


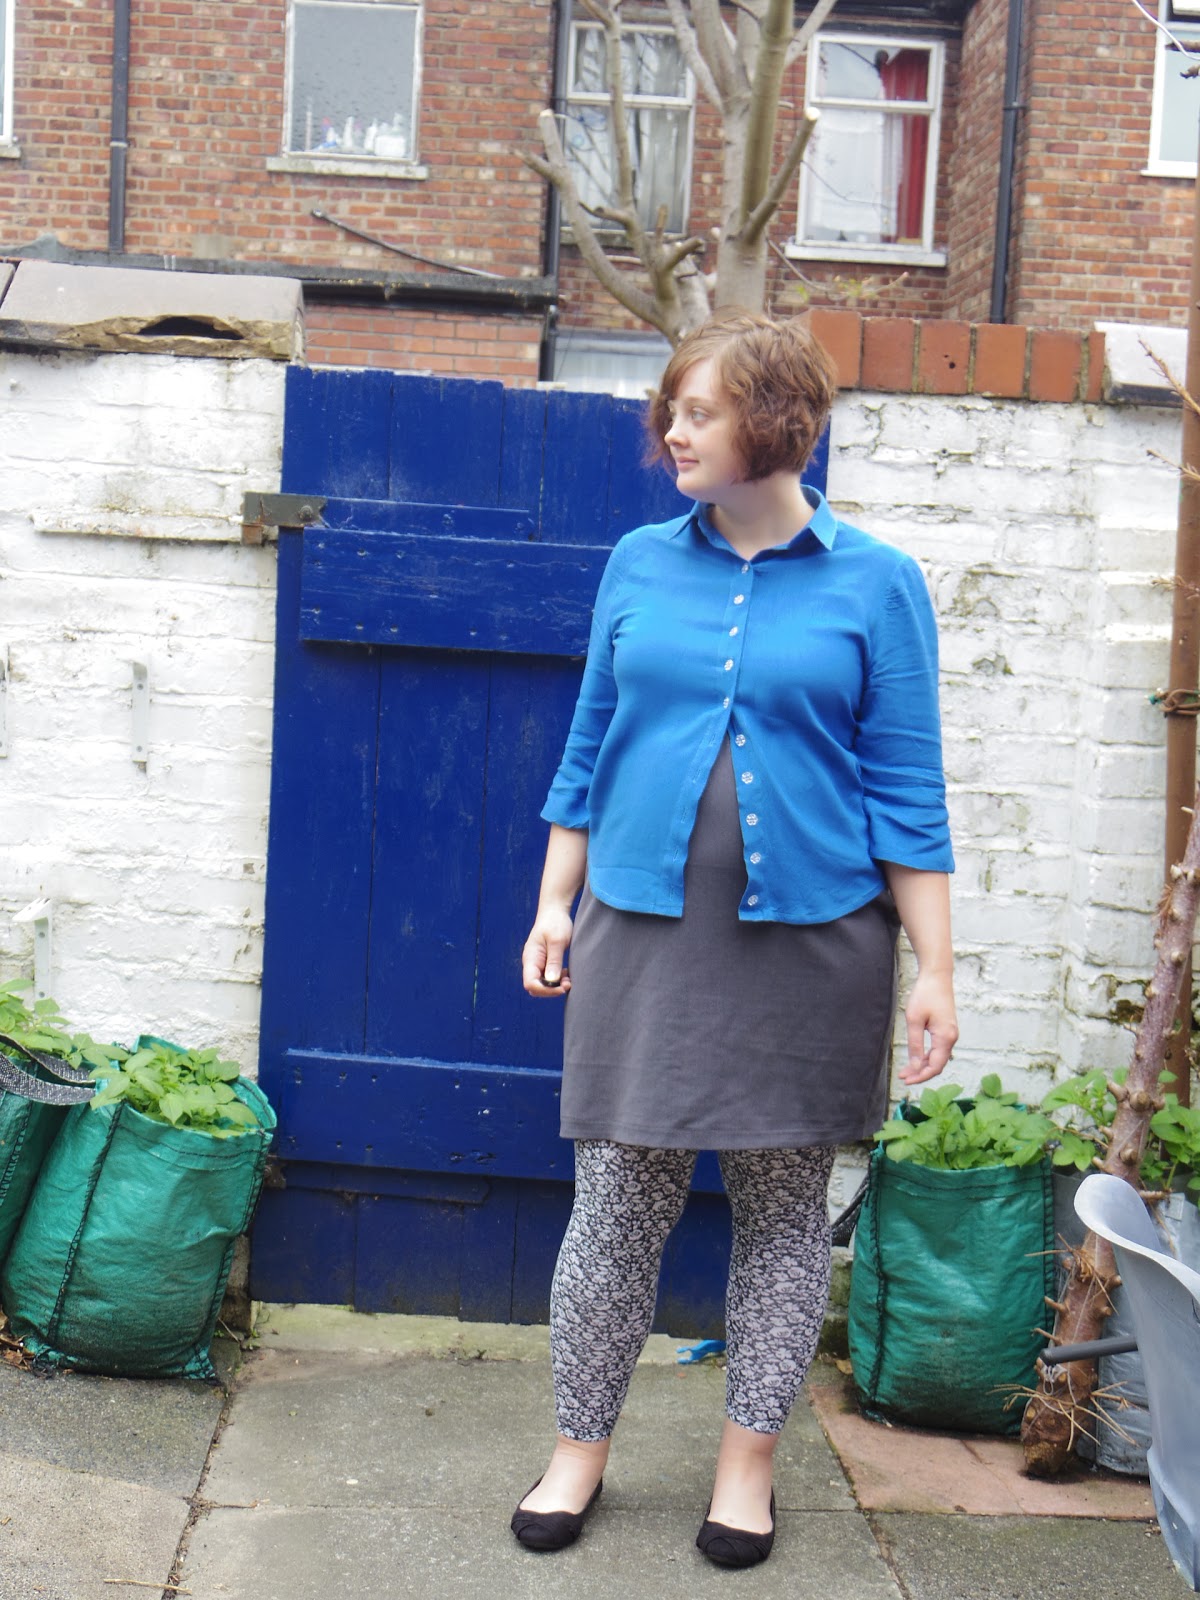
I'm wearing the shirt here with the maternity version of New Look 6128, unfortunately it no longer fits. I think I could make another one with a bit of extra pleating, but I've only got four weeks of work left now so I'm not sure if it would be worth it. I'm very happy with the fit of the shirt, though obviously I can no longer close it ha ha. It works tucked in though, and I have some floaty skirts I can wear with it. I made this in a plain fabric for once which I'm proud of. I didn't even add a quick spot of embroidery to it. Very unlike me!


Cat bombed! You can see that the bottom of the shirt has been shaped more like a shirt than the previous version. I laid a shirt that I had in the drawer over the adapted pattern piece, and traced a new version with a little more room in the hip, and the curve at the bottom of the shirt. 

The back of the shirt fits well, though as you can see there are quite a lot of wrinkles in the bottom half of the shirt. I assume this is a sway back issue which needs to be adjusted some more, though maybe it's caused by bump so maybe best to wait before making any changes. 


Here's a little picture of bump, though the usual disclaimer applies, I'm bigger now blah blah ha ha. 


Thursday, 9 April 2015

A&A Cami 2: Widen Armholes

Good evening kind folk!

First off, thank you so very much for all your kind words of congratulation in comments and on Twitter. We are overwhelmed by your generosity! Me and Mr T have been doing our usual dealing with the little stuff, and the big stuff is taking care of itself. Thank you for your luck with the scan, everything looked grand, working organs and everything, I'm not sure how interested you are in our baby's organs... but now you know :-)

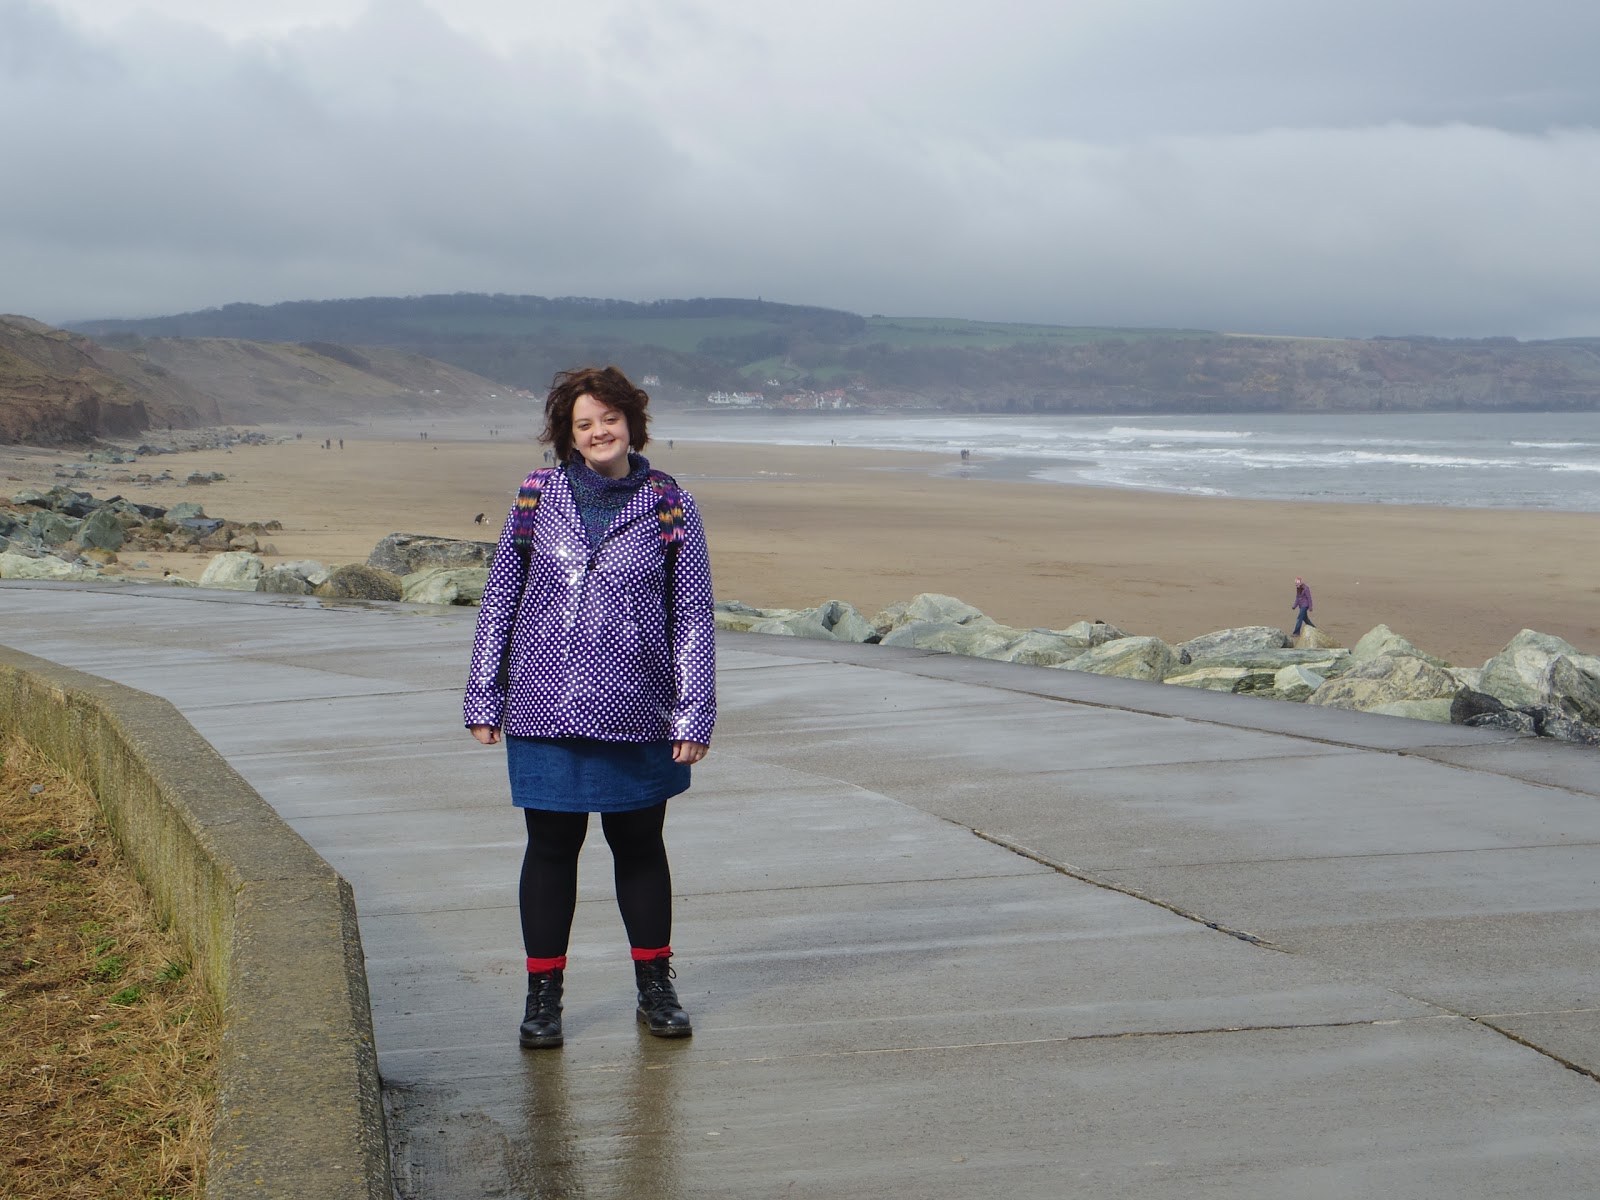
The weather has been amazing! We went to Whitby for the weekend, and I brought my thickest Mum knit jumper along as obviously I knew I would freeze. However, I got a sun burn! I know, nothing to brag about, but the first time you are caught out by the sun in the year is always worth a little celebration in my book. Here's me delighted just to be on holiday, however cold. I'm wearing my purple rain mac that I made last year, it's finally warm enough to wear it yay!! It really needs a zip though as half the buttons have popped off due to the inflexibility of the fabric. I'm trying to find a suitable double ended zip, but it's hard work getting one the right colour and size. Any tips?

Just imagine how big my smile was when it was sunny! I'm saving those pics for an outfit post, as I've finally got pictures of the map top I wore in episode one of the Sewing Bee. I've had quite a few requests regarding how this was made, so can't wait to show you the process.


So where were we? I've been taking you through some of the adjustments that I made to the Cami to make myself a standard shirt dress and shirt pattern. We have made adjustments to the shoulder seam, so it should now sit directly on the edge of my shoulder. You can read about this wide shoulder adjustment in my last Adaptation and Alteration post. I was hopeful that this would give me a little extra room in the bodice that would get rid of some of the pulling. However, I knew that the armholes were still tight, so I made an adjustment to widen the armhole. 

You can read a little bit more on this technique here:
1. If you previously cut a smaller size for the armholes, and you can still see the pattern marking for the larger sizes, then just cut along this line. If not, then mark the amount that you want to drop the armhole (I did this in 1cm increments) on the side seam. Using a french ruler copy the curve of the original seam line lower down, matching your mark up with the original curve as you can see in the diagram.

2.  Then you want to extend the side seams on the arm piece to match what you have just taken away from the armhole. I found the easiest thing to do was to re-trace the sleeve piece, then add the amount you need (should be the same as you have taken from the armhole in step 1) horizontally from the end point of the curve on either side of the sleeve. Taper this down to nothing at the end of the sleeve piece. 

So! As the original dress fitted so well, and I had now added so much room to the pattern at this point, I paused. I didn't want to go completely the wrong way and add in too much ease which would then result in a massive unwearable garment. So this is when I decided to make wearable muslin No. 2. 

I don't like the term wearable muslin... it makes it sound like it's a practise run, which I guess it is but doesn't do justice to the amount of work that goes into something like this. I wanted to do something a little different this time, as I didn't want to jump straight into another shirt dress. Therefore this time I opted for a shirt

In order to make a shirt pattern from the bodice, you extend the lines of the bodice out into the length for a shirt. I usually copy a shirt I already have:

1.  I first laid down my pattern piece on the table, I then covered this with see through medical paper which I use for tracing patterns. you can use any paper which is durable enough to withstand being pinned etc but is still see through enough to see the pattern pieces beneath. 

I then laid a shirt that I already owned over the pattern piece that I had made all of the adjustments to so far, matching up the end of the armhole and shoulder seam. I then traced the new hem line and hip angle up to the shirt side seam. I took away the shirt, and traced the rest of the shirt pattern that I had previously made adjustments to. 

You will want to ignore the bottom dart, but add in the bust dart to provide some shaping to your shirt.

2.  Using a ruler, follow the placket lines down from the pattern piece to the new hemline. Also you want to smooth out the harsh edge where the bodice and the hip line meet. You can do this by eye, or with a french curve. 

Hopefully you will now have a fully altered pattern piece to make a shirt with! Phew! With this pattern I made the Fantastically Generous Bloggers Shirt that you can see here! 


There is a lot more room for manouvre in this, but it still has its issues. The least of these issues being that it has now gone in the cupboard as I can't fit Bump into it anymore. But let's not dwell, there's plenty of time to deal with any further changes to be made in the next installment! I hope you're finding these posts useful, I always enjoy reading more in depth about the fitting process that someone goes through, as it reminds me that we don't all fit straight out of the envelope, and that there are fixes out there for these issues. 

I've got a weekend to myself this week, and I can't wait to sink my teeth into a more in depth sew. However, I really should make some more stretchy work skirts. Lets see whether head or heart win ey? You can follow me on instagram to get more up to date posts on what I'm doing right now @dfabricater.

Thursday, 11 December 2014

The Fantastically Generous Bloggers Shirt

I had a week off from le blog last week, sacrilege I know! But as you may know from my previous post, I started a new job and as we are on the countdown to Christmas there is just so much to do! I've been bringing a few things together, including some ideas for my secret santas. I decided to take part in two this year. One by A Krafty Kat, the one that I took part in last year, and have grand plans for my pressie. Also I have taken part in a newer crafty secret santa by Stitched Up from the Start I've got a great person and can't wait to get it all wrapped up and sent away.

How has your week been? Mine has been good, the new job wiped me out for the first week, lots of meeting new people (even though I've only moved down the hallway) and wrapping my head round a whole world of new acronyms. But I'm feeling good about the move, and can't wait to go to my (two!) Christmas parties.

When I got this new job, I started to think about getting some more work appropriate clothing. I would say that work clothes are one of the things that I love most about making my own clothes, I think I might have mentioned that in my Washi post. I want something that shows my personality, can be dressed up or down, and is layerable (because I sit on an air vent... not as exciting as it sounds). The photos in this are terrible, you can probably tell that yourself but I thought I'd mention it, sometimes it's either terrible pics or freezing pics while your neighbours watch you whilst clearing a garden. I went with bad pics.


Enter my Pauline Alice Cami Shirt

I got the buttons, and lovely... especially bad photographed bias binding from my secret santa last year, I snuck in under the line for making this before the next Christmas! This lovely packet came with instructions, I was to make a shirt. I hope I did you proud Santa!


Unfortunately I didn't find a place for the light blue ribbon, but it awaits in the stash for the perfect project. 

The detailing comes from another lovely bloggers de-stashing from the 2013 Birmingham blogger meet-up, unfortunately I didn't make this years... I was hungover (to my eternal shame). But hopefully it will be on again next year and I can tag along because it was a brilliant day. I got the following material from Amy of Almond Rock, in the great de-stash/ swap, and added it to cuffs and collar.


The shirt is a little tight in the back (see slightly unflattering picture below), I did widen the sleeves as per the adjustments I thought of from the Zig Zag Cami, including a wide shoulder adjustment, which did work as the shoulder seam now sits comfortably on the edge of my shoulder. However, I don't think I widened the arms enough and that is what is causing the tightness. On to the next version!


I bought the skirt in this post from a charity shop in Edinburgh when we lived up there, it had weird little tacked on badges of squirrels and owls, which I removed. It's a great skirt for walking up a hill, or going to the office, and is super warm for chilly knees. The lining was recently falling apart so I attached a new lining to the inside of the skirt, using the edge of the old lining to stitch to.


I love a colourful lining, this was another purchase from the blogger meet-up... there have been a few things languishing in the cupboard for a while ey? Feels good to be using up the stash.

Overall I'm very happy with this shirt, this pattern is on its way to perfect, and once it's right I have so many plans for pattern hacking. I'm very excited!... but should get back to making Christmas pressies. Selfish sewer? Who... me? Hope you have a great weekend.

Debs


Sunday, 5 January 2014

Happy New Year!

Welcome to 2014 lovely people.

How are you all?

I had... I'm not going to lie here, a very drunken welcome into 2014. One of those nights were you think, have I changed at all over the past 5 years, or am I just exactly the same? It was slightly depressing to be honest, so the idea of ringing in the New Year with shiny resolutions etc wasn't really on the cards.

But a few days have passed, the dehydration (and embarasment) has dissipated, and I have so much to be thankful of for the past year, and a lot to look forward to.

Christmas was awesome, much more calm than usual and that suited me down to the ground, one of my favourite parts of it was participating in the Secret Santa present project as organised by Krafty Kat.

This was a brilliant idea, bringing me closer to a blogger as I tried to figure out what would be the best pressie. I hope they liked it!

Plus, I got my gift through the post and was so excited! Love getting post at the best of times but then to know it contained a little pressie based on what I might like was fabulous.

Here is a (terrible) pic of me super excited opening it:


And here were the lovely contents:


I don't know if you can read the lovely note that came with it (I took the package all the way to Northern Ireland with me on my flight so the packing got a bit crumpled). But my Secret Santa has set me a challenge. I am to make a shirt with these trims (in my favourite colour no less) with piping on the back yoke, blue buttons and bias binding on the seams. A shirt is actually on my goals list so this could not have been better suited! Thanks Santa, such a thoughtful gift. 

I have lots of goals for my year, but at the moment they are floating around a bit in my brain rather than being written down so I'll come back to that. In the meantime, I wish you a craft-filled, goal achieving 2014. 


LinkWithin

Related Posts Plugin for WordPress, Blogger...